Junior
  
Currently Offline
Posts: 117
A+'s: 1
Joined: Jan 9, 2012 18:18:11 GMT -6
|
Post by dryshave on Sept 30, 2013 11:54:10 GMT -6
Slowly progressing - waiting for my machinist to come back from holidays to complete the tail piece. Waiting for the leather beading for the front cowl and waiting to meet with the clock repairman for the gauge hands. but I'm slowly picking away at the small stuff. Floorboard mats cut and fitted. Holding them in place with brass clips (can be seen in a couple of the pics) coffee cup holder brass done. Seat sealed and ready to pour new foam this weekend, then it's off the upholsterer. Gas tank has been sealed and neck extension in place. Have a possible "issue" with the rear tire - a little too tall of a profile and I've only got about 3/8" clearance to the timing adjuster bolt and the same on the engine wheel bracket (see pictures) no sure if that's enough or if I will have to pick up a lower profile tire ? Headlight bucket and windscreen finished and just waiting for the parts to complete the bodywork. I haven't drilled any holes in the new brass pieces. Learned a lesson about waiting until everything was "bolted" in place before drilling. Have already had interest to show it in the spring, still hope to send the scooter professor a christmas card with the completed project - fingers crossed. Still haven't finalized the grill design - too many choices now that I can have it laser cut, but will narrow it down over the next couple of weeks. Vacuum chamber is finished and ready to rock on my next vacation in two weeks. Hope to have some samples up shortly. You can see the custom airbox along with the lenses and lens backings that are set to be molded. I had to do the airbox in two pieces, you can see in a couple of the pics how it looks. Should I combine the air filter assembly with the air exhaust of the gearbox? or just cap off the gearbox and handle them individually. 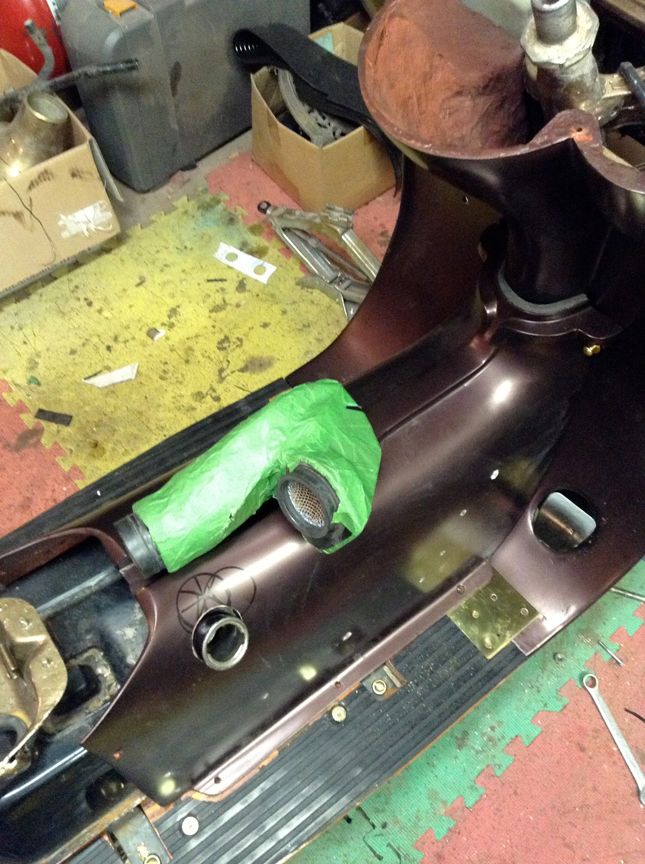 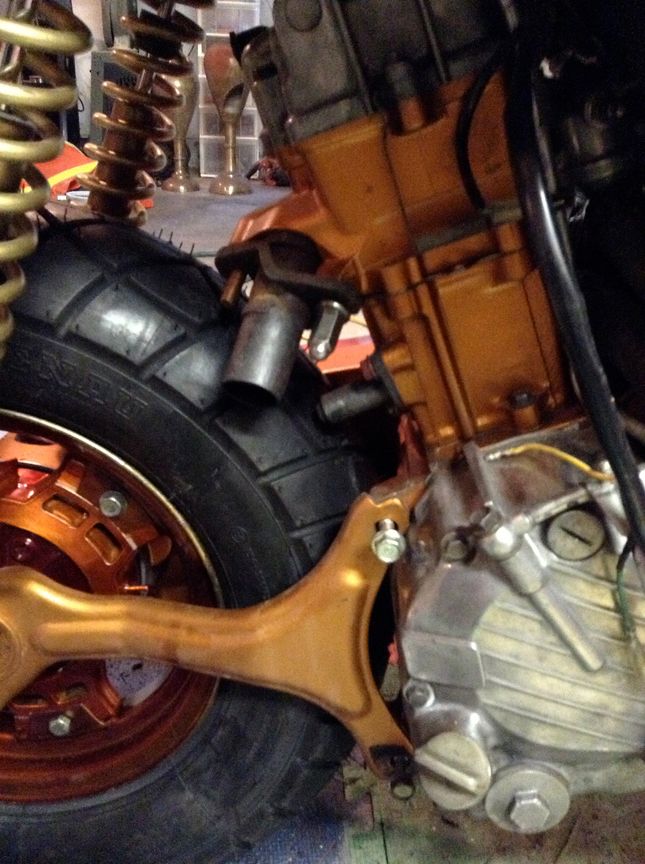 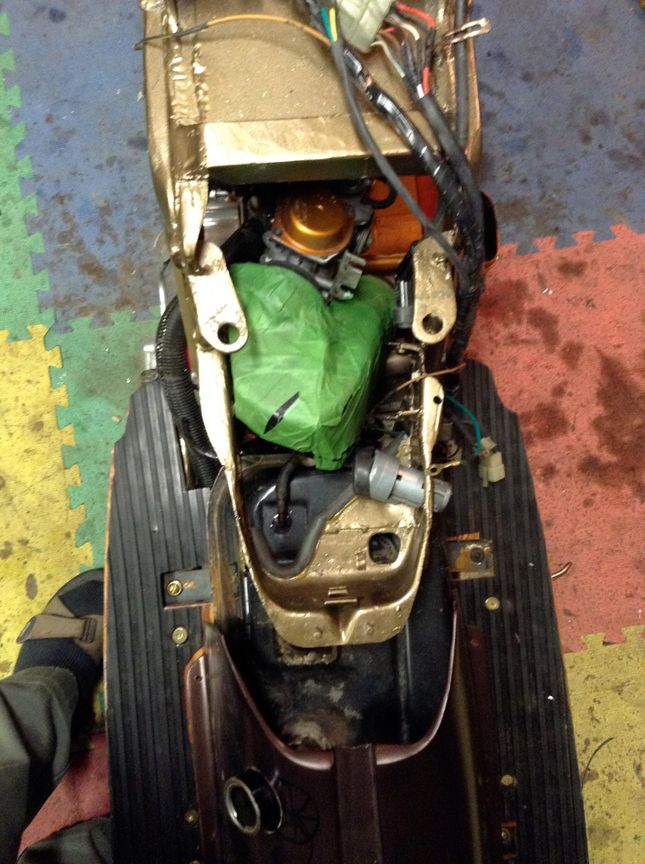 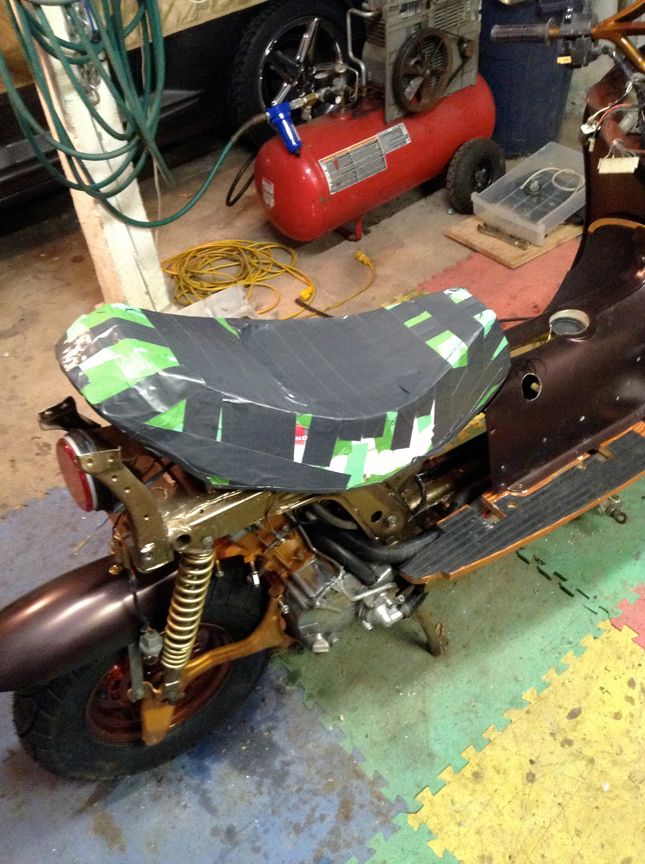 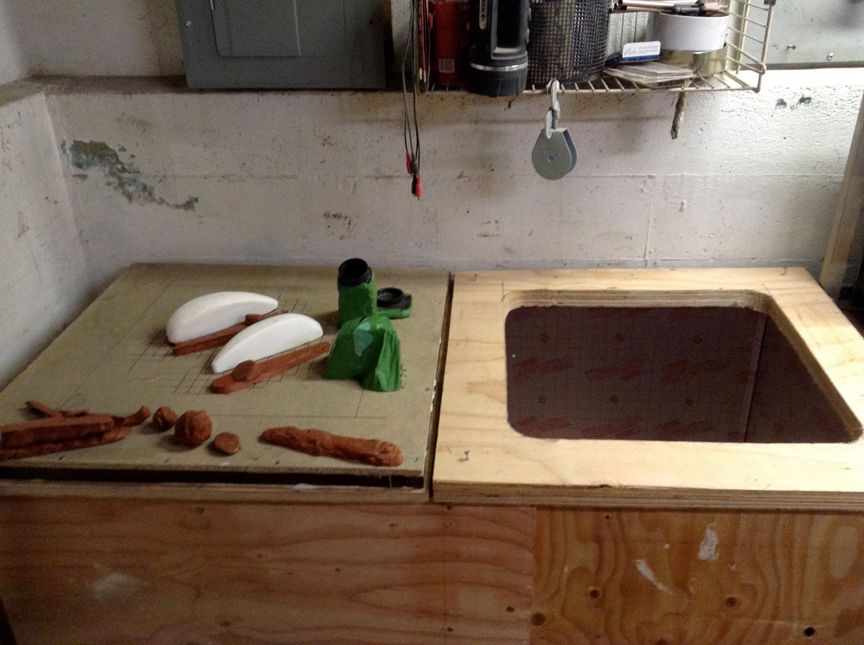 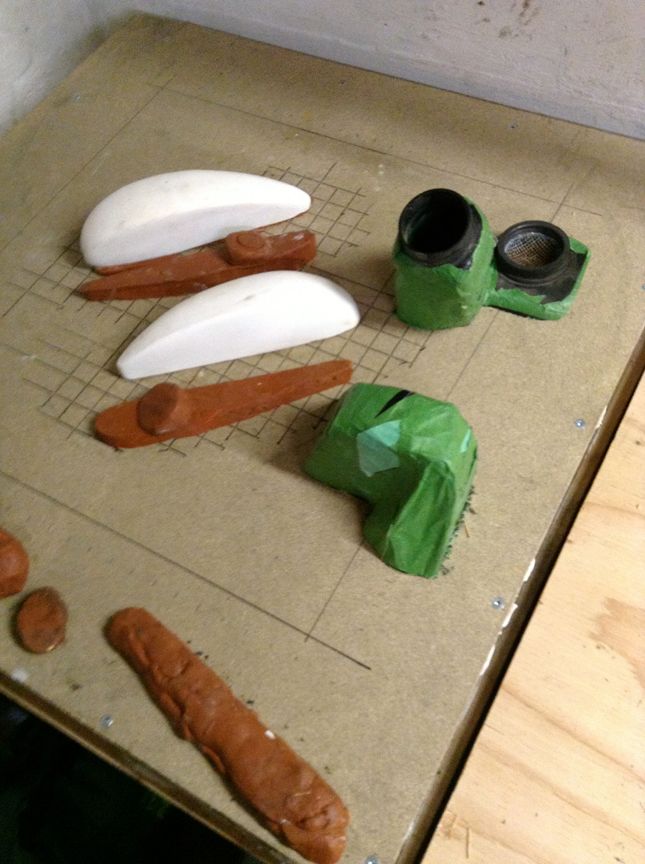 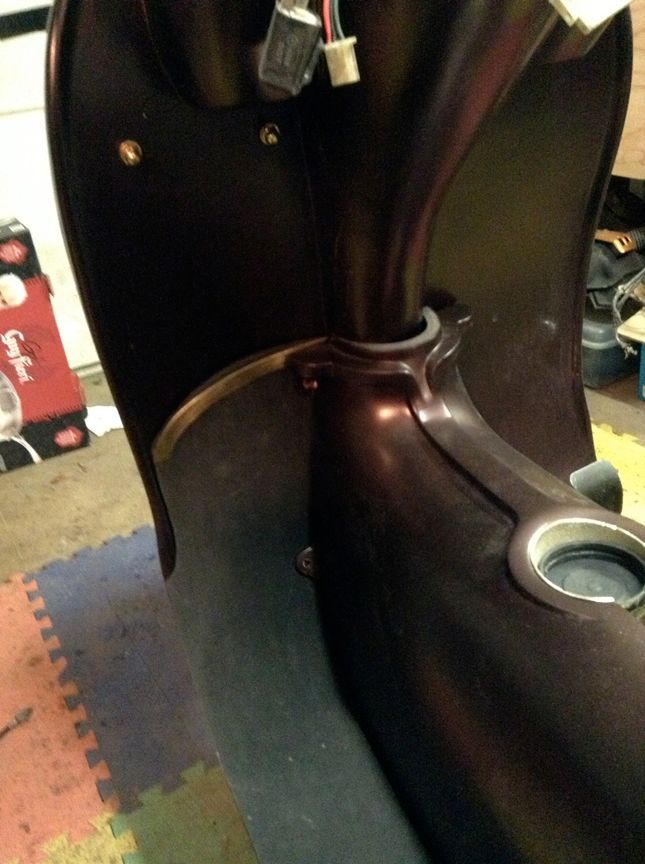 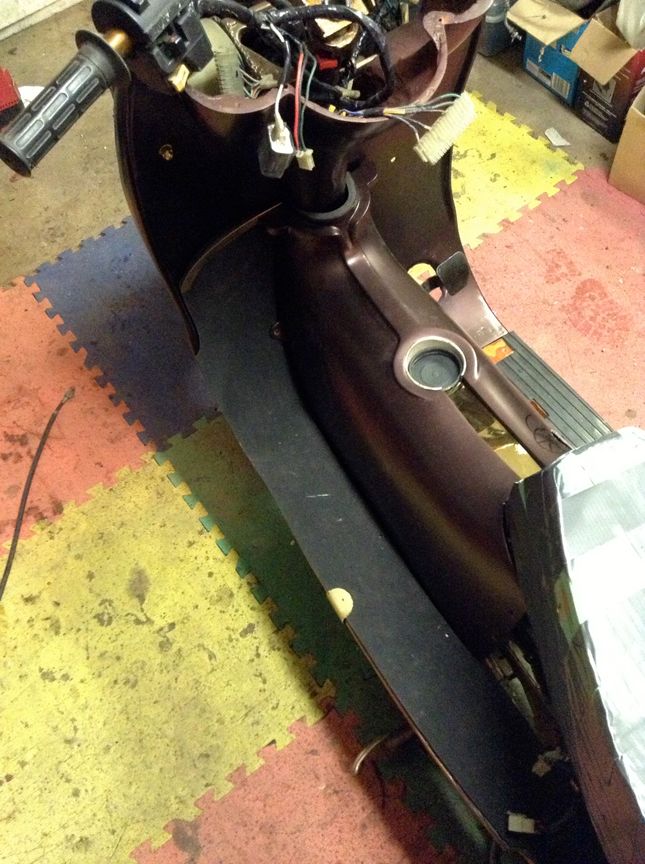 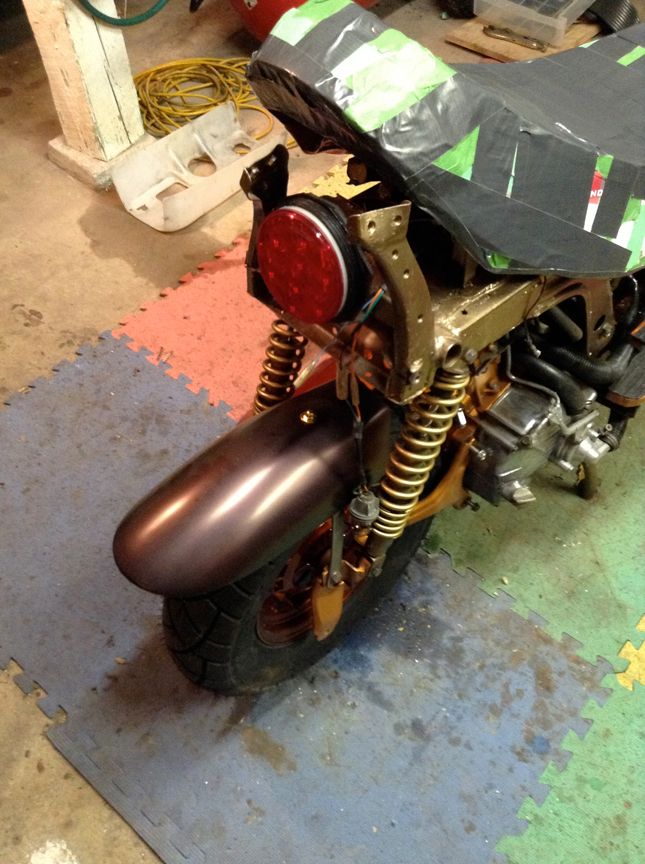 |
|
Junior
  
Currently Offline
Posts: 117
A+'s: 1
Joined: Jan 9, 2012 18:18:11 GMT -6
|
Post by dryshave on Sept 9, 2013 11:59:55 GMT -6
Just may make your birthday deadline after all "professor". Vinyl labels for gauges - check Tires and rims complete - check new rollers/belt/brakes ordered - check vacuum chamber built - check Cord seal for around cowling - check (going to be awesome - the leather is the same colour as the paint) pics this week Rear brass piece in for detailing - check Still to do - final paint and clear coat Cast the lenses Finish gas tank mods Custom downtube for exhaust Custom airbox I've used the new duplicolor brass paint on the rims (that's what its for) and pretty happy how it turned out. The exhaust heads off to the fabricator to be wrapped in brass. The down tube mockup is off to a custom exhaust shop. The rims are over at the tire shop (new valve stems installed) and for new tire mounting. Meeting with the clock maker this week for the hands for the gauges. Still haven't got the grill layout yet. I've made a CNC contact, so they can pretty much do any design I come up with. More pics soon. 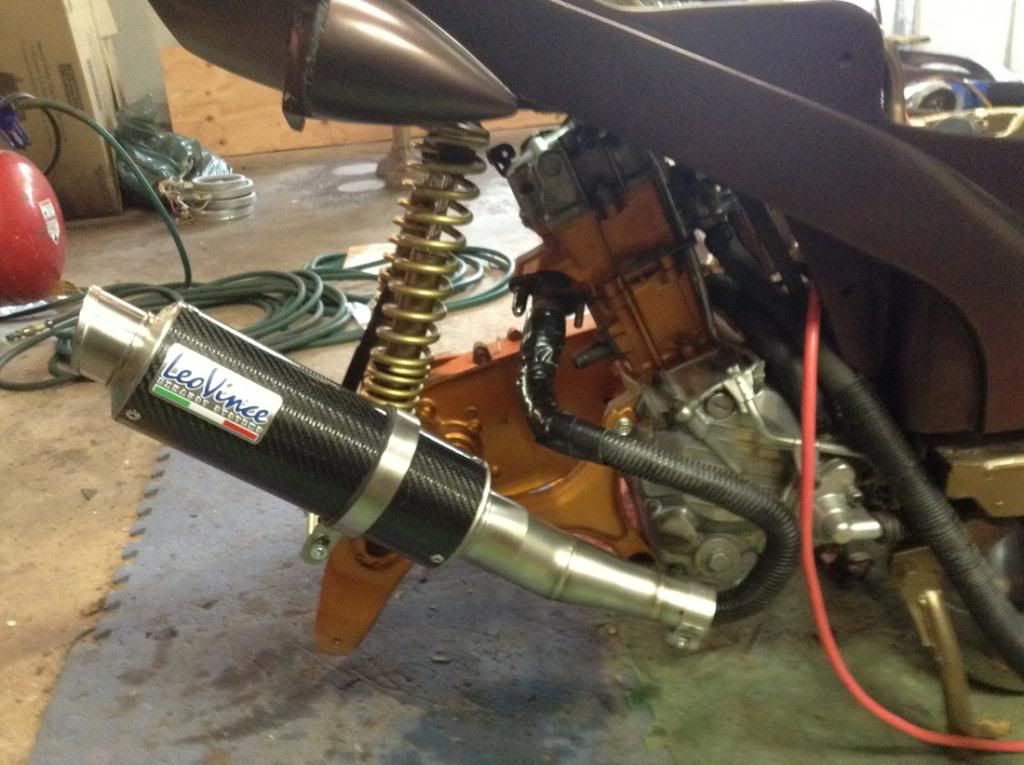 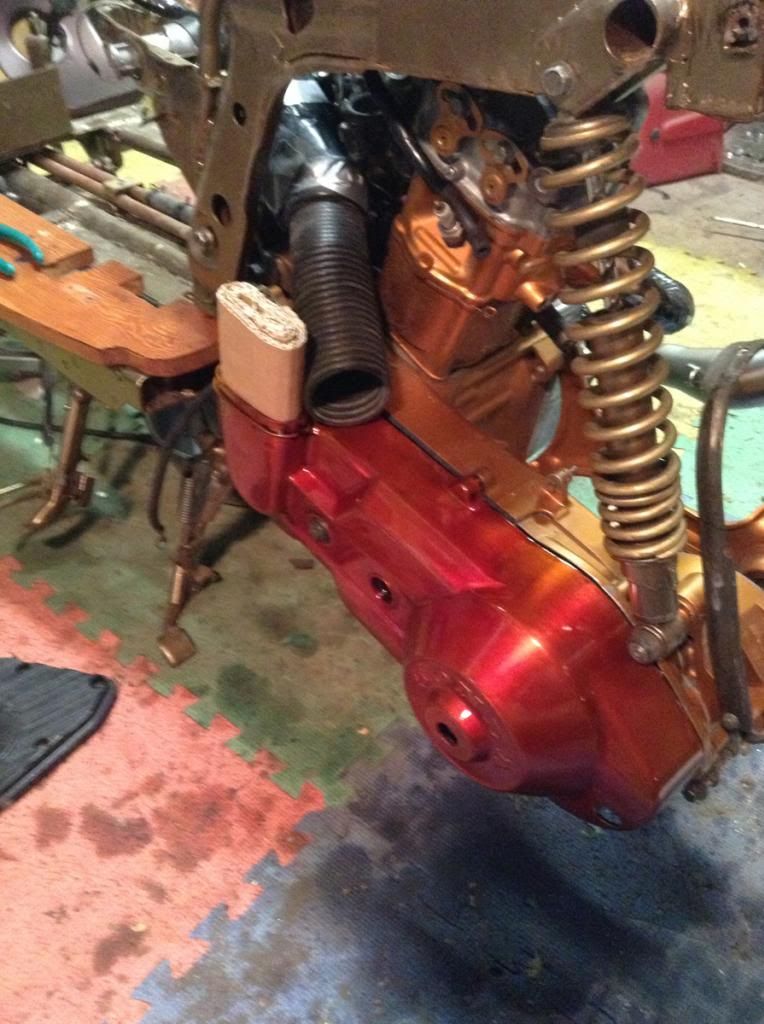 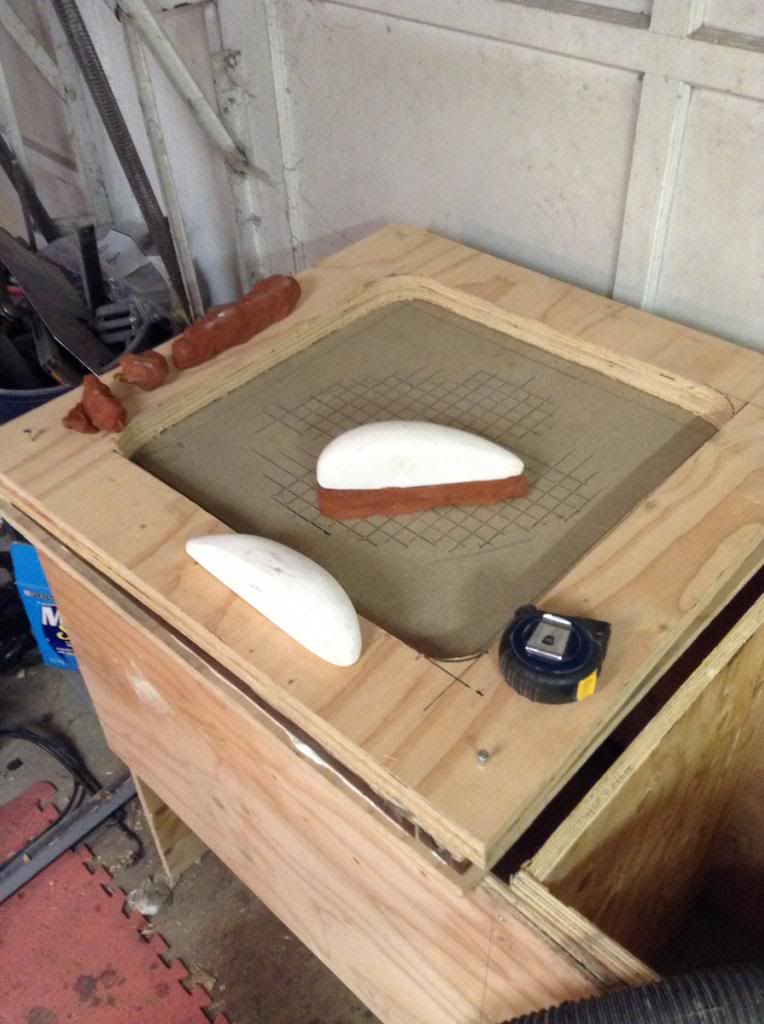 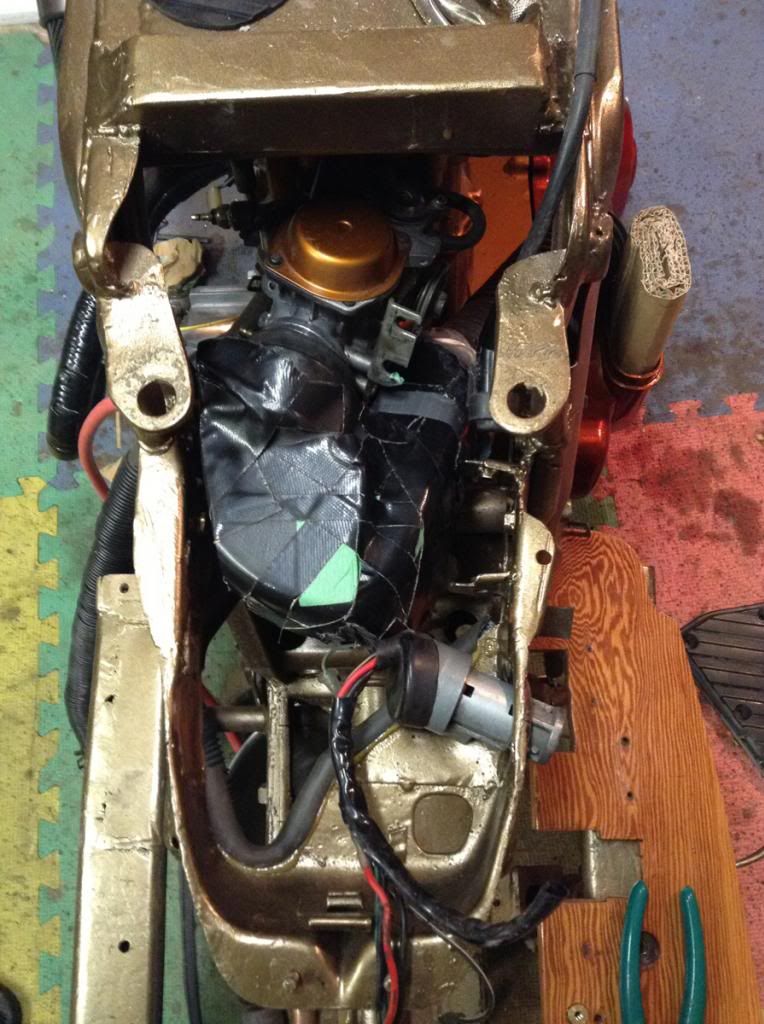 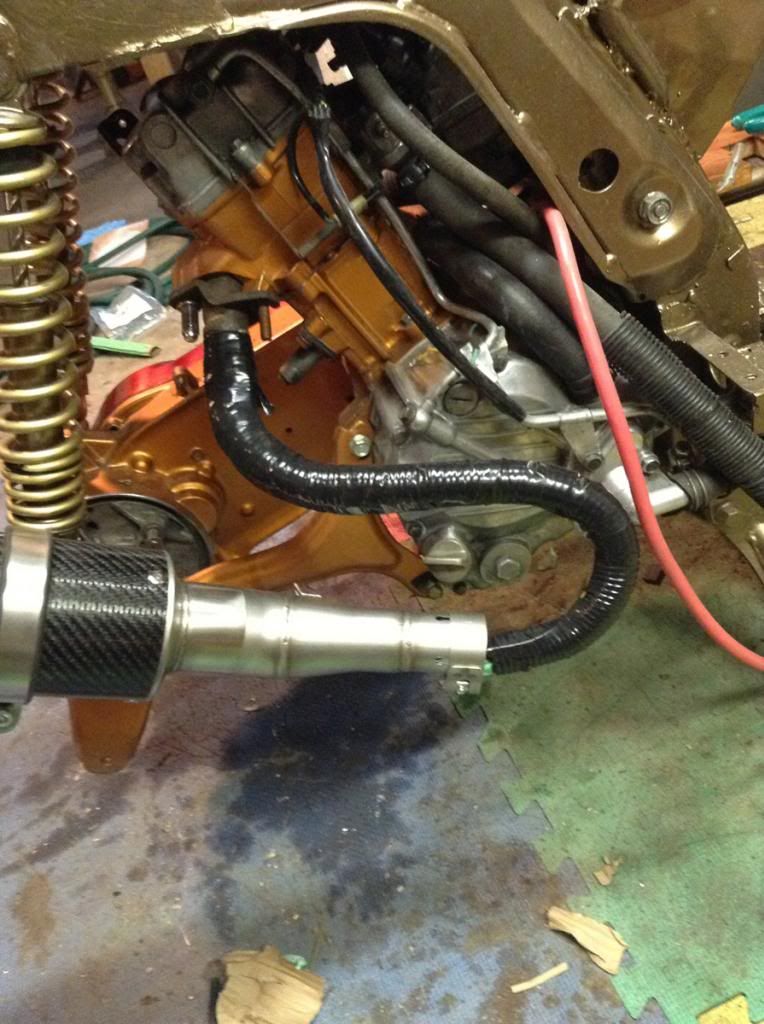 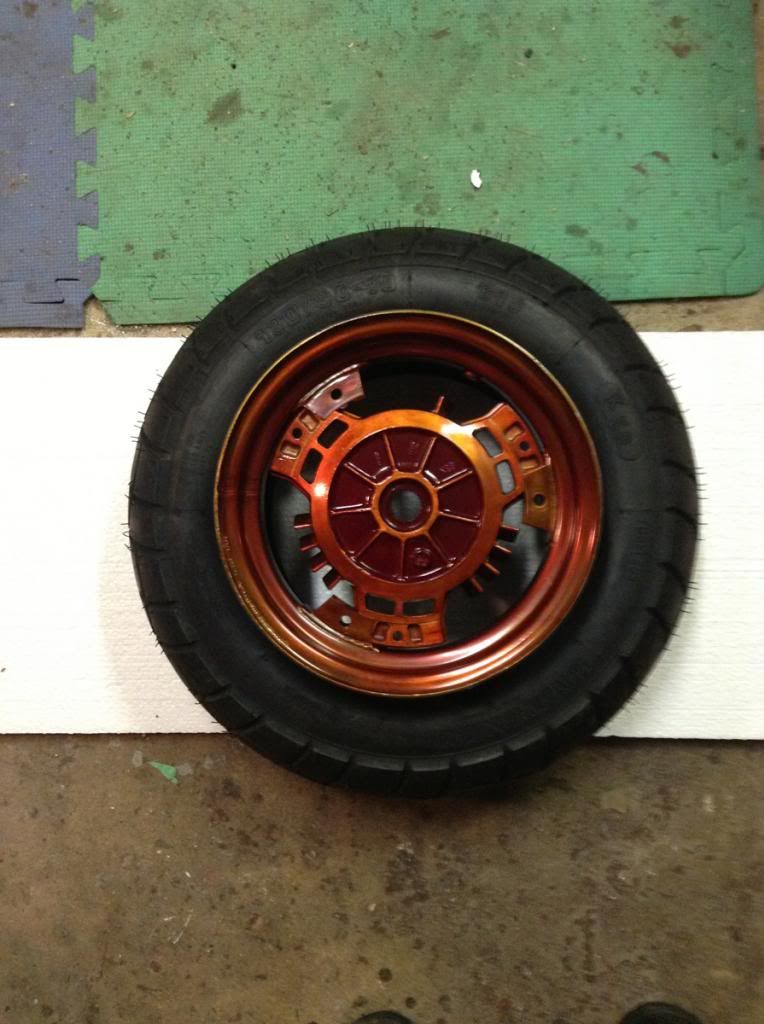 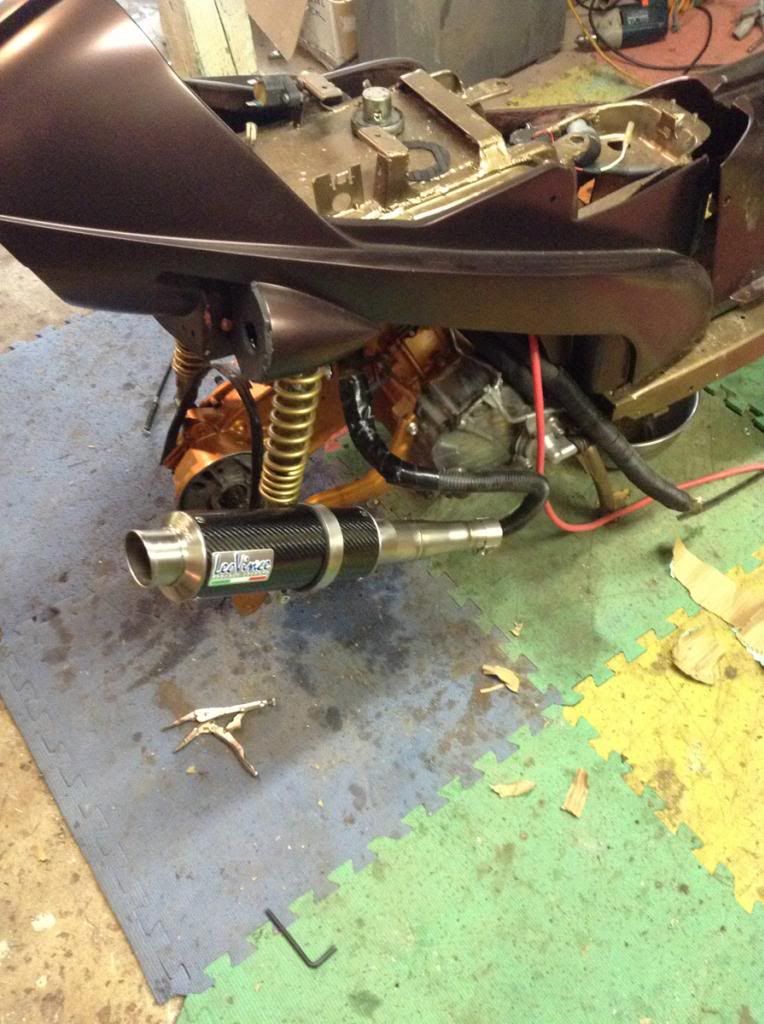 |
|
Junior
  
Currently Offline
Posts: 117
A+'s: 1
Joined: Jan 9, 2012 18:18:11 GMT -6
|
Post by dryshave on Aug 20, 2013 12:01:15 GMT -6
ALIVE AND STILL KICKIN' This new work shift is kicking the crap out of my shop time, now it's just weekends and a couple early hours in the morning. So you can see from the pics that I'm not riding by the middle of August... did I say this year?? Have completed the first 3 coats of paint though and started polishing up the bronze. I haven't applied the clear coat yet, as I'm final checking the assembly points for missed edges and having to touch up assembly scratches (after clear coat) would be a real pain in the ass. Right now I've got two more coats planned and then final clear (several sanded coats). The bronze tail piece is going to be drilled out this week... I brought in these photos to the foundry this morning and he asked why they weren't approached to do the brass work... I told him they were and no one got back to me. He was pretty pissed for missing out on the job. I told him I understood their situation and one off jobs aren't on anyone's list of priorities. Have all the brass bolts and fasteners in hand and will start attaching the pieces with their final fasteners in place. Am working on the design for the seat with a local upholstery shop, going to be done in a medium dark chestnut leather - like a saddle, they're also doing the saddle bags that will attach to the centre console. Time to order up the wheels and external engine pieces. Waiting to hear from scooterdawgs(?). Anyone got an alternative shop to deal with, like to keep it amongst friends and supporters. Am assembling the vacuum chamber this week, will start molding the lenses - more detailed pics on that process. Still need to mount the tank fill gooseneck - finish gauges - finish headlight - quadroople check the wiring harness... and a whole bunch more of little jobs. Sorry it's been a long time between postings, but I felt you guys (gals?) had seen enough images of bondo and fiberglass. It's beginning to look like something now. The paint is a blend - the original color was a too much like eggplant purple, so I mixed some copper to it to warm it up. It's got a nice warm red brown color in the sun and a darker brown under the shop lights - it'll change again when I add the clear coat. Will load up more pics before the weekend. 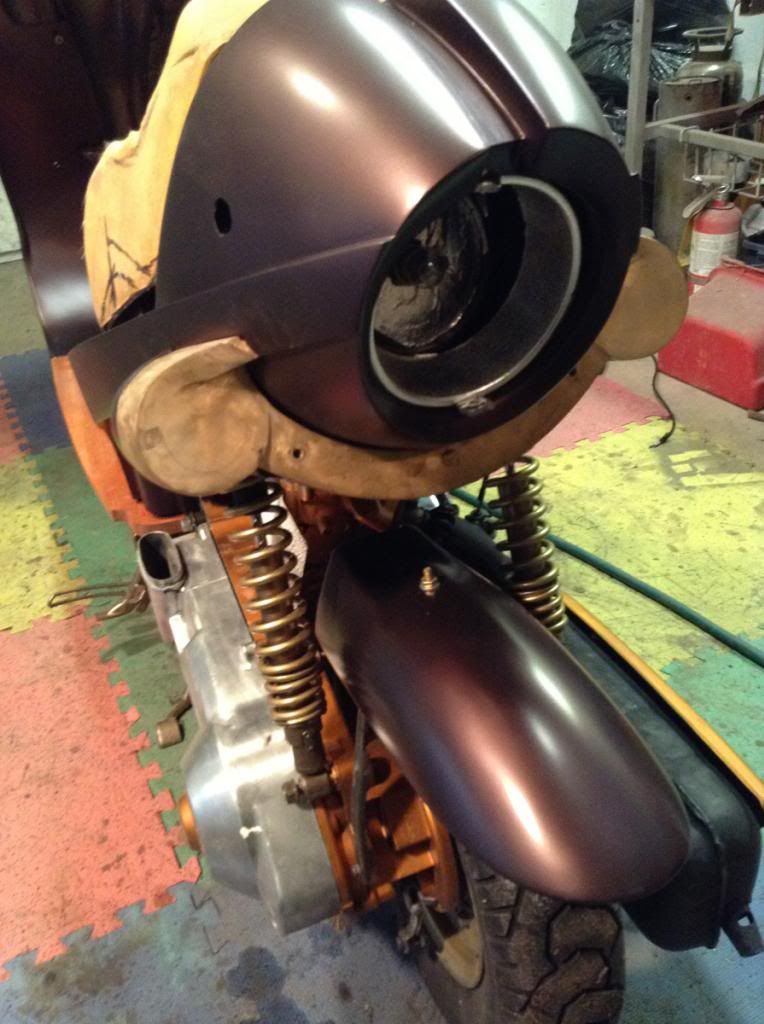 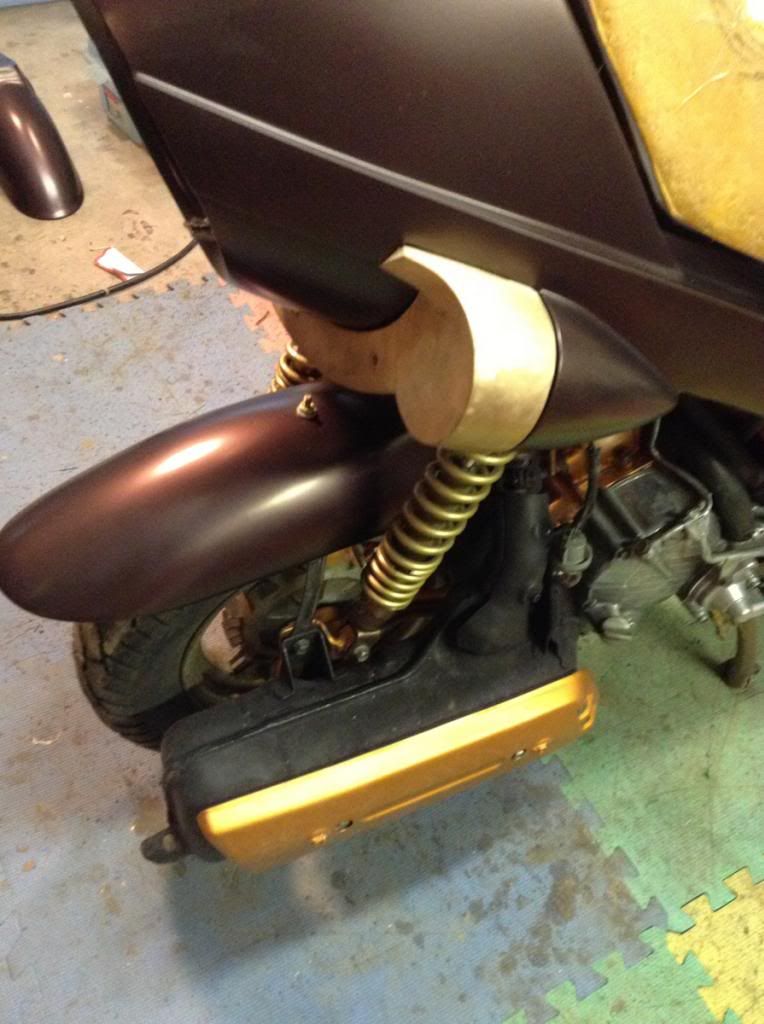 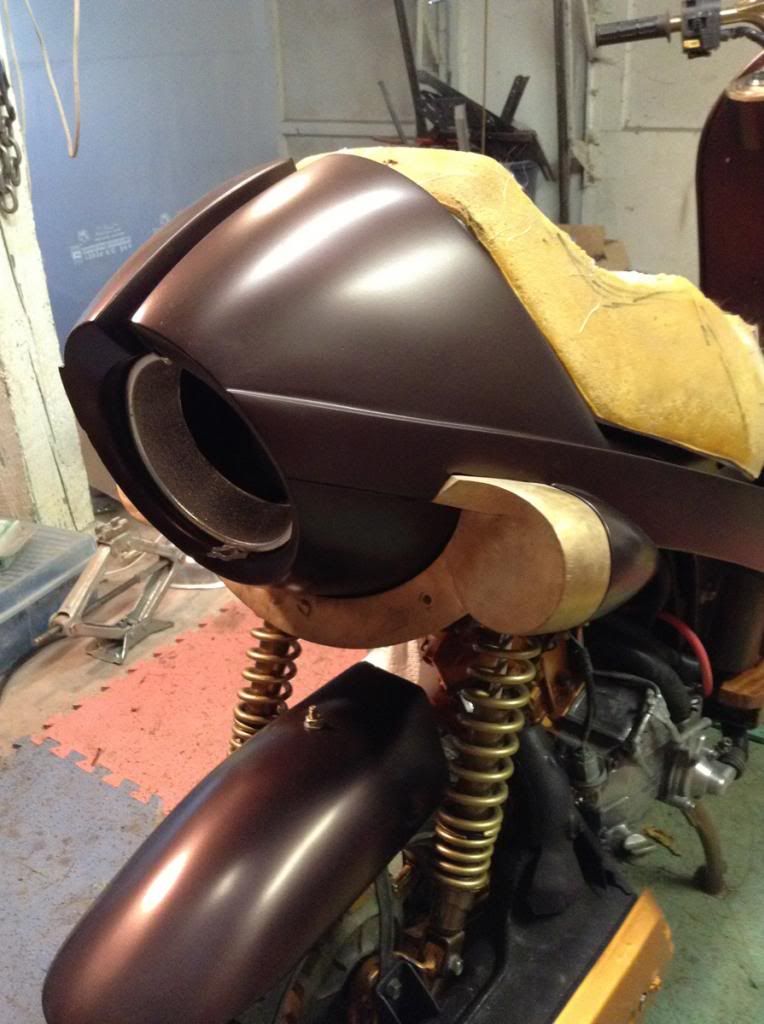 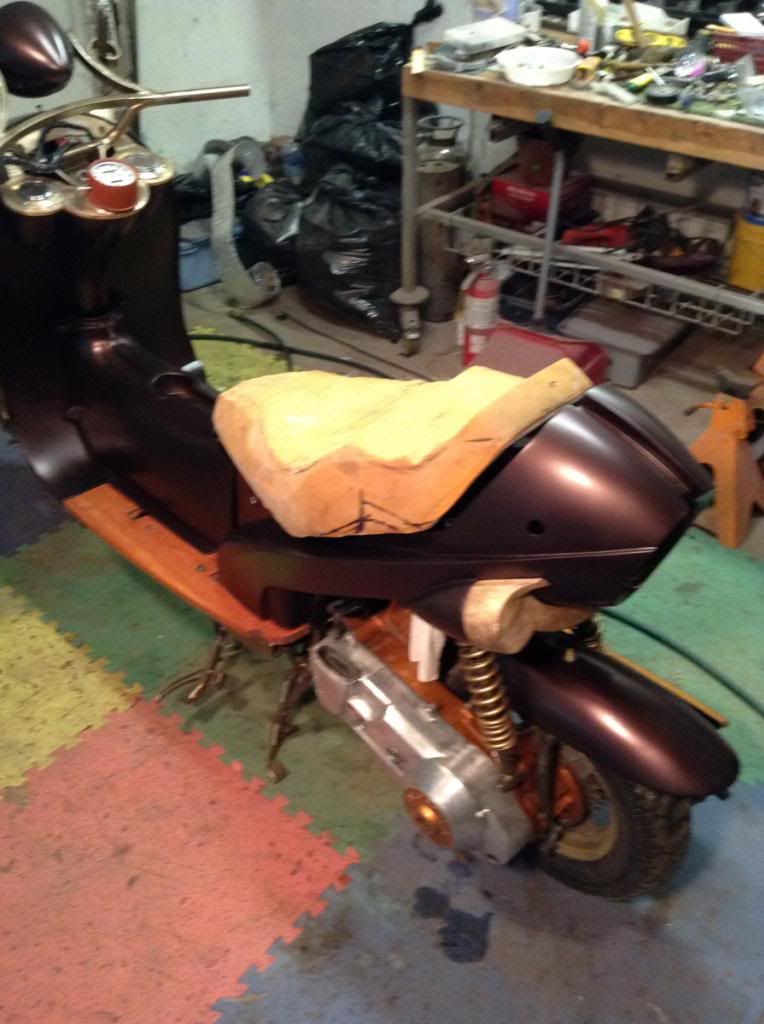 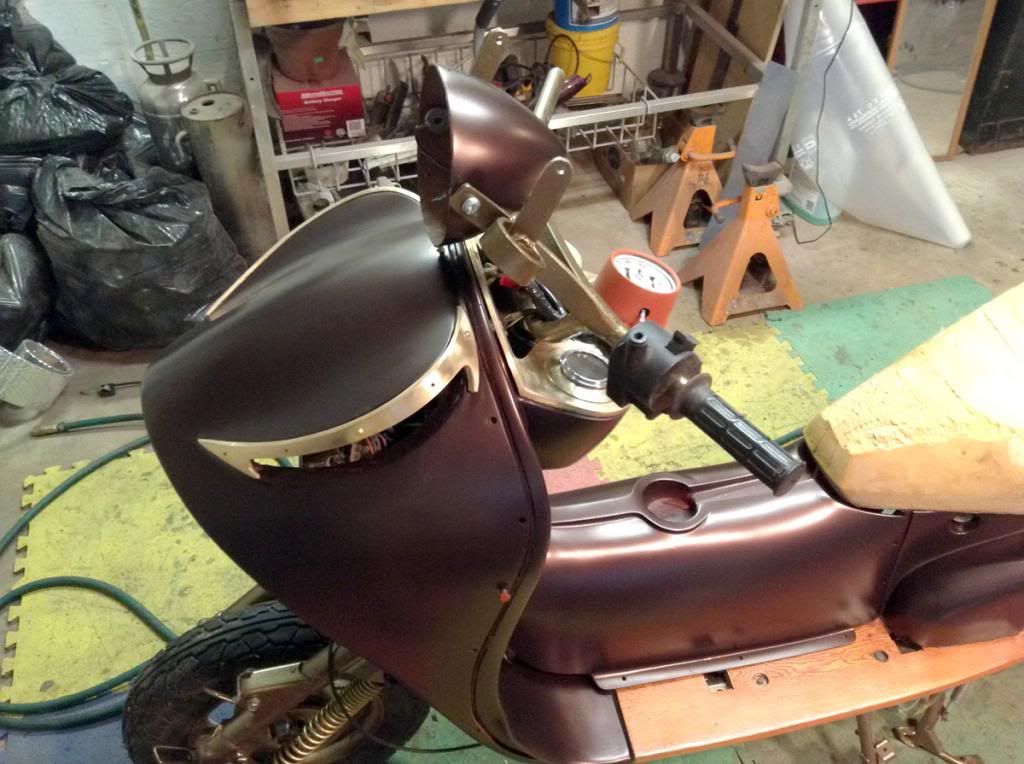 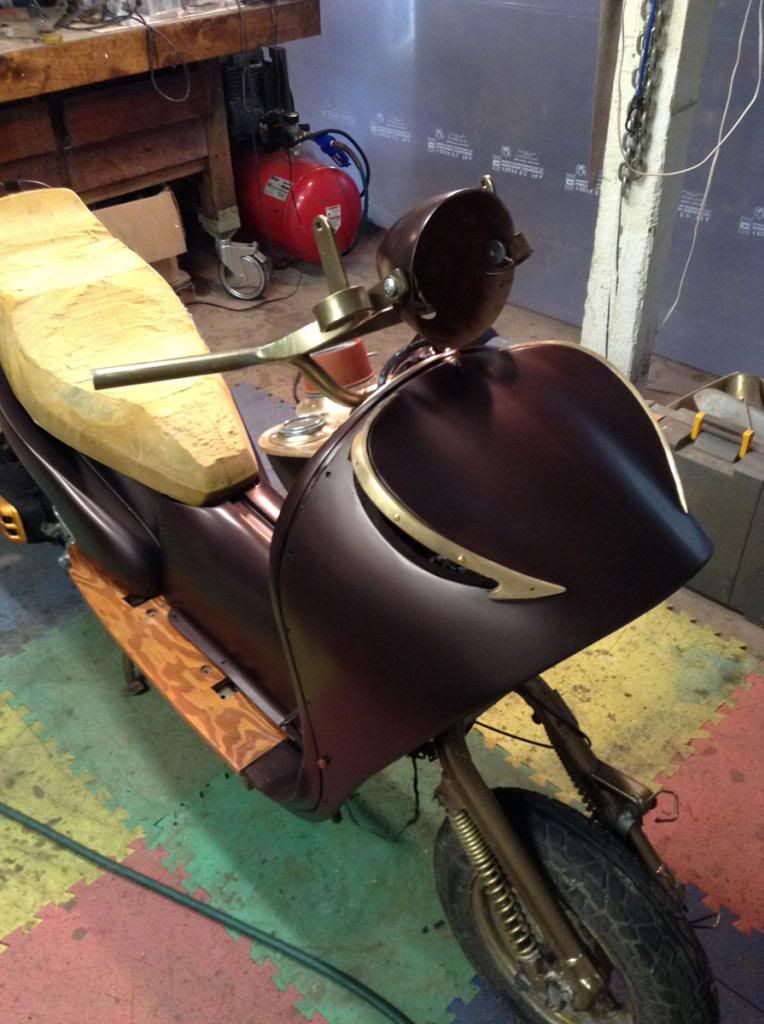 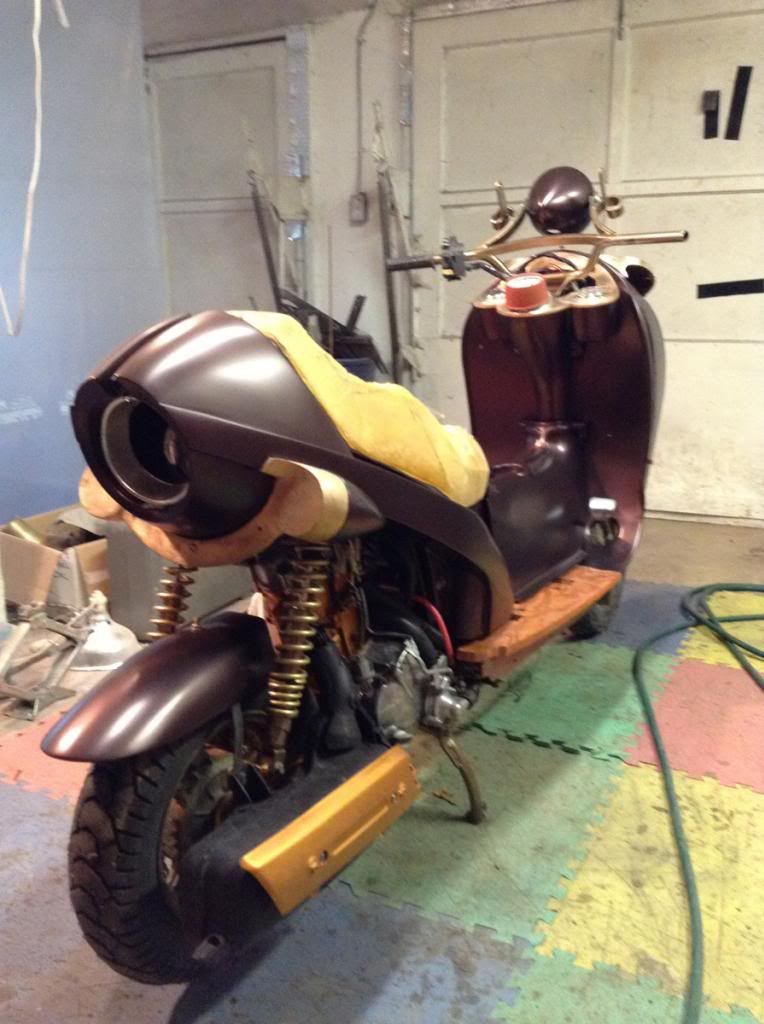 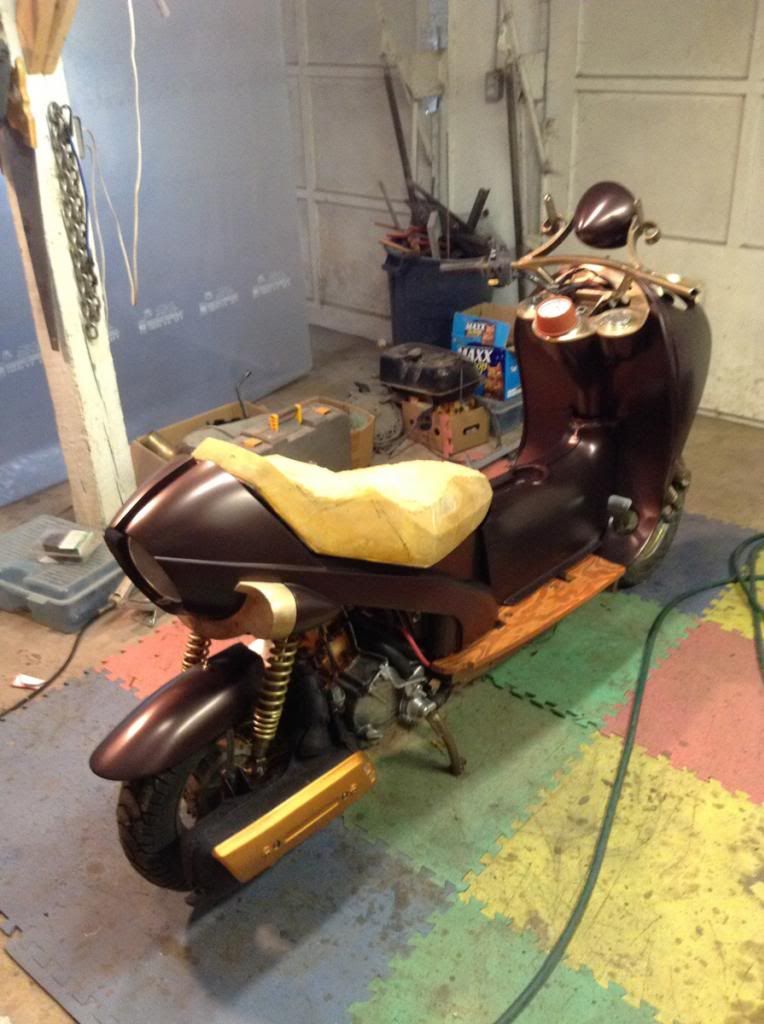 |
|
Junior
  
Currently Offline
Posts: 117
A+'s: 1
Joined: Jan 9, 2012 18:18:11 GMT -6
|
Post by dryshave on Jul 16, 2013 11:32:32 GMT -6
Missed the paint deadline... not because of the bodywork (sort of) but due to new government restrictions on the type of paint I was planning to use. I have used and been a big fan of the PPG candy colours for years and I guess the government has now made it illegal for the average joe to purchase and use due to high toxic vapour levels... Hell I knew that and I always protected my self and vented the shop properly... CRAP! So now I have to find an OEM paint colour they can reproduce for me.. Unbelievable! So just a couple quick picks of a couple final prepped for paint pieces. Still doing some adjustments to the front section, but everything else is ready to go. so in the mean time I'm ordering all the aftermarket pieces such as exhaust/rollers/belt brakes tires. My work shift has changed to and that's throwing a wrench into my shop time. I used to work afternoon-evenings and now I'm back to days. I still get up at 6:00, but now only have a small window in the morning to get anything done and an hour or so afterwards. I'll get used to it soon, but the past couple weeks have been kinda slow progress. 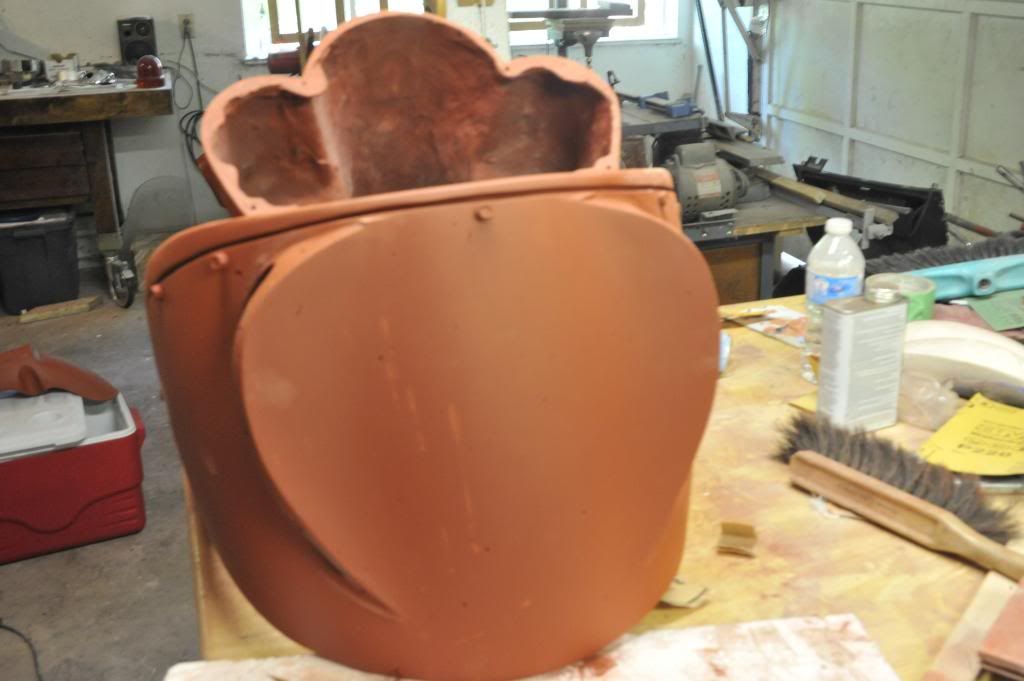 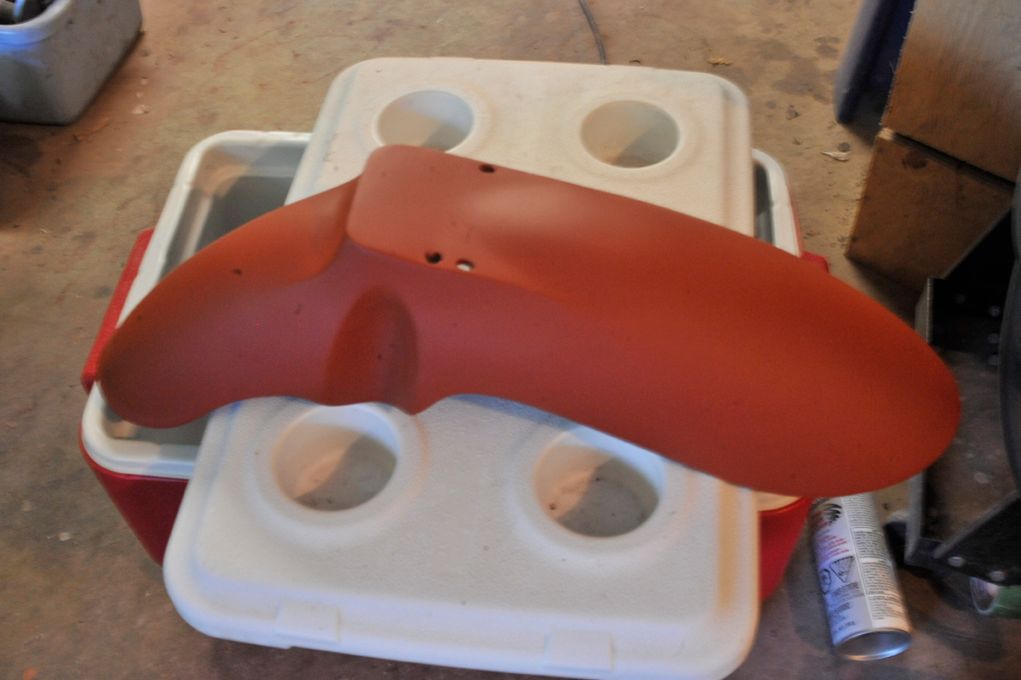 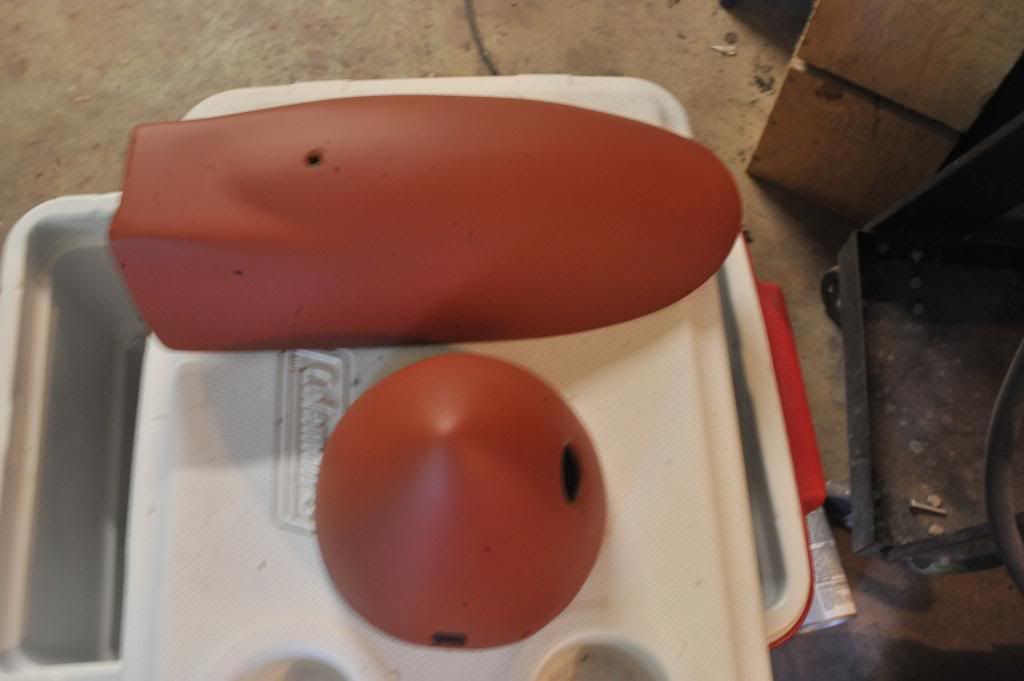 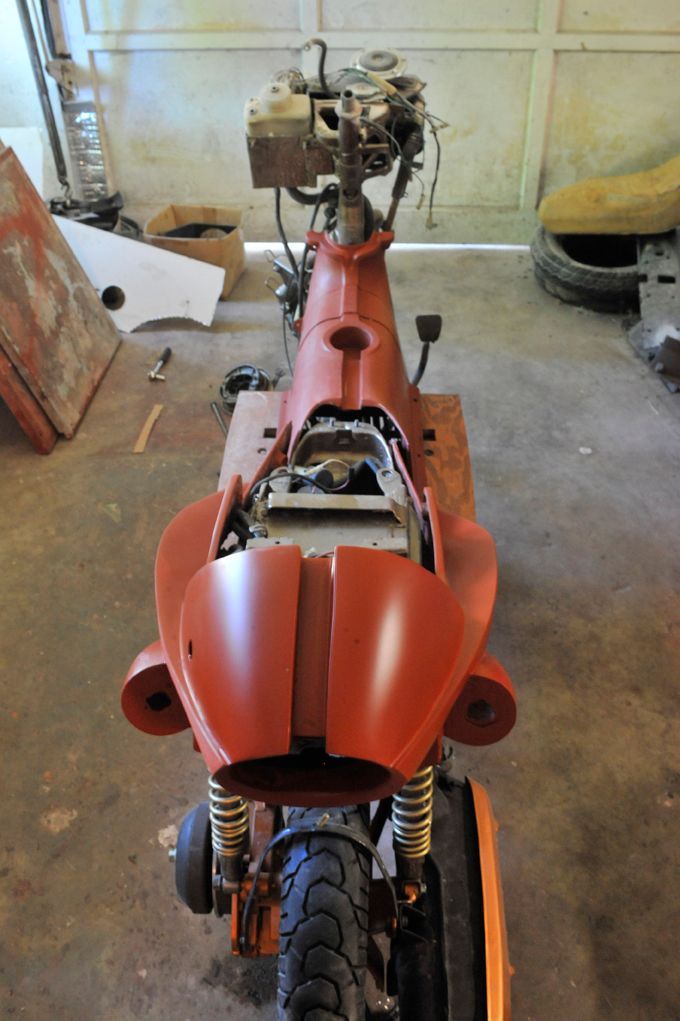 |
|
Junior
  
Currently Offline
Posts: 117
A+'s: 1
Joined: Jan 9, 2012 18:18:11 GMT -6
|
Post by dryshave on Jun 20, 2013 19:36:07 GMT -6
you can see a black line on the brass brows, these indicate where I will grind down to. The original casting was created thicker than necessary... I wanted lots of playroom when it came to final adjustments, it's paid off.
|
|
Junior
  
Currently Offline
Posts: 117
A+'s: 1
Joined: Jan 9, 2012 18:18:11 GMT -6
|
Post by dryshave on Jun 20, 2013 19:34:06 GMT -6
|
|
Junior
  
Currently Offline
Posts: 117
A+'s: 1
Joined: Jan 9, 2012 18:18:11 GMT -6
|
Post by dryshave on Jun 13, 2013 19:04:50 GMT -6
You can see in the last photo where I had to make more fiberglass "corrections" to the dash pods (that's done now) but there's a hole where the glass was thin.
|
|
Junior
  
Currently Offline
Posts: 117
A+'s: 1
Joined: Jan 9, 2012 18:18:11 GMT -6
|
Post by dryshave on Jun 13, 2013 18:59:59 GMT -6
|
|
Junior
  
Currently Offline
Posts: 117
A+'s: 1
Joined: Jan 9, 2012 18:18:11 GMT -6
|
Post by dryshave on May 31, 2013 15:10:19 GMT -6
I've used just regular pop rivets for now as they are there for position only. I can easily pop them on and off with a sharp chisel. I'm also experimenting with different burnishing techniques for the final finish. My plan was to used copper rivets, but they're pretty hard to find locally and probably too soft. My thought is to use round capped slotted brass bolts and mount with the nuts inside (this is final mounting) then grind off the round cap flush which will leave a flat brass cap @ 1/8" thick, the same with the tail piece. I've also done some dash mods as well, expanding the slot in the middle where the handlebars sit, leaving more space for the cables and wiring to run freely. I've already cut it out and it looks much better. Going to hook up with the machine shop next week and get those rear signal holes cut out. Got the next 10 days off, spending half of them finishing up the bodywork... looks like the weather will co-operate, will get better pics up too! Still undecided on final color, will put up some swatch samples an ask for suggestions. Gauges will be finished over the next week as well. Can't wait to paint.
|
|
Junior
  
Currently Offline
Posts: 117
A+'s: 1
Joined: Jan 9, 2012 18:18:11 GMT -6
|
Post by dryshave on May 30, 2013 20:00:45 GMT -6
AWESOME! That's my response to the cast brass pieces. There's still some tweaking to do to have them fit 100% but there won't be a lot of adjustments to be done. I am making some changes to the dash, that you won't see in these photos - sorry for the lousy low lite pics, but it's been raining for the past couple of weeks and I just don't want to open up the doors. Talk about heavy metal!!! the tail piece must weigh in close to 30 lbs just by itself, but I will lose roughly 5 lbs of that weight when I have holes for the rear turn signals drilled out (you can just see the outline I've drawn on for the machinist) in one of the pics. Now I can wrap up the bodywork and it's perfect timing as I have the next week off and we're scheduled for sunny weather. So I should have all the bodywork finished and ready for paint by the middle of June. Paint by end of the month - still on schedule - or was I supposed to be riding by July 1? Still got the lenses to cast for the front turn signal and getting the front grill in for water jet cutting. There's still the seat to get recovered and gauges to finish, but once I can write the bodywork off the to do list, the rest should move along quicker than the past month or so. I look at the nearly finished panels now and look back to the eager anticipation of Page 1 - what was I thinking! more in a week 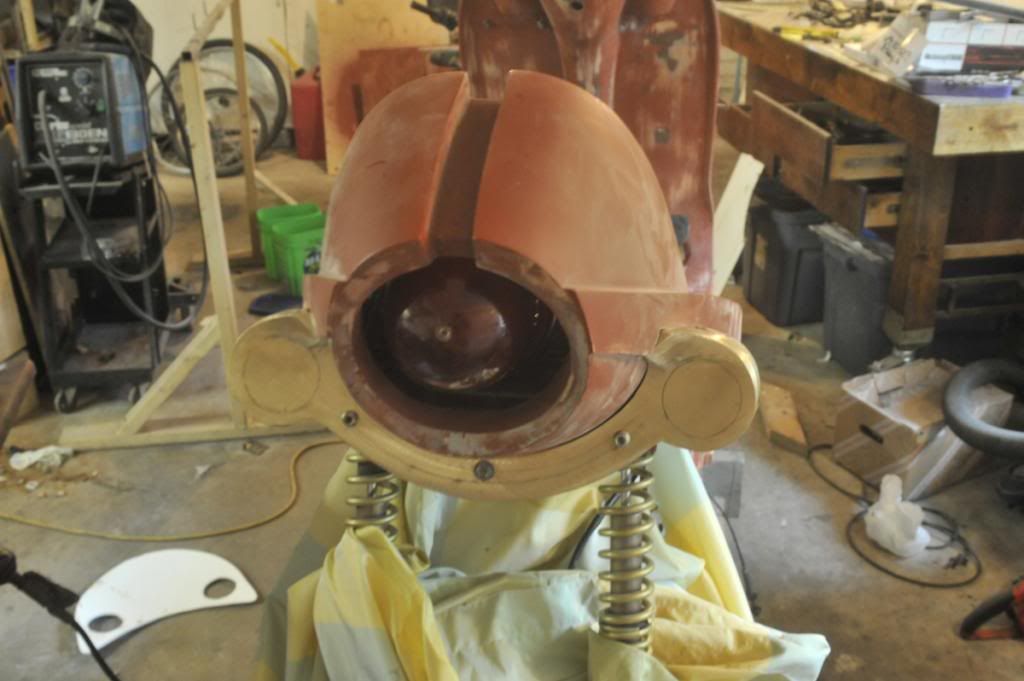 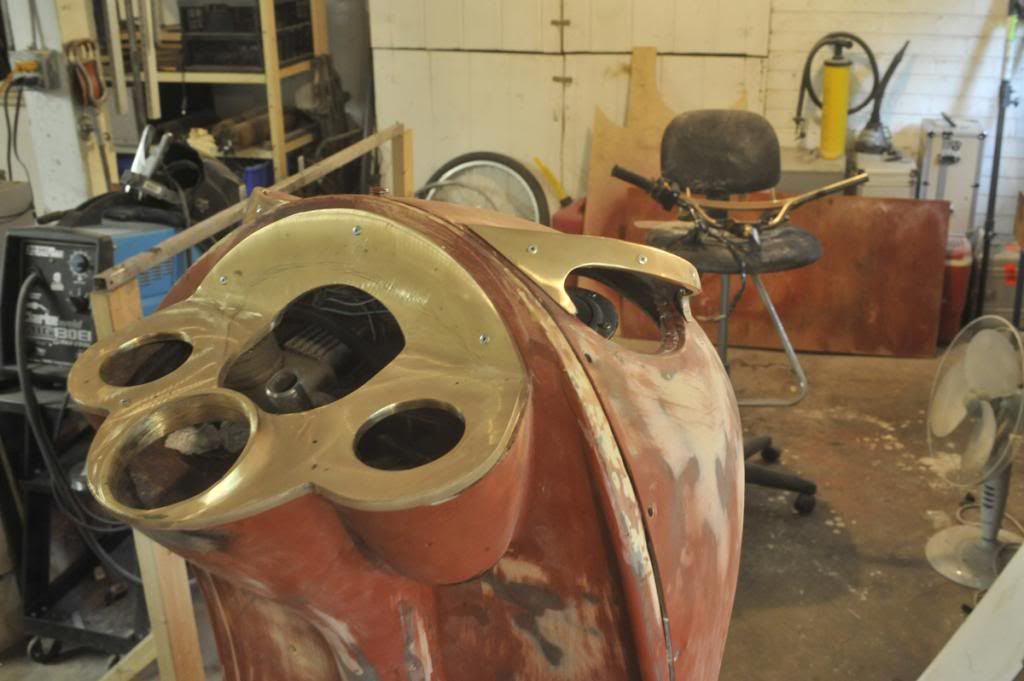 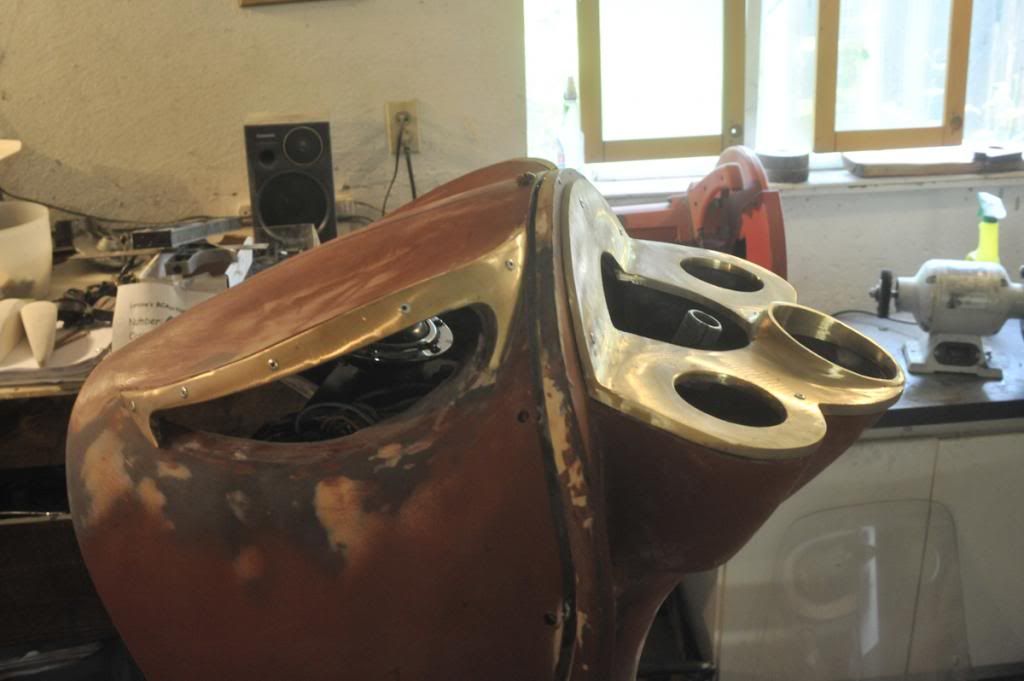 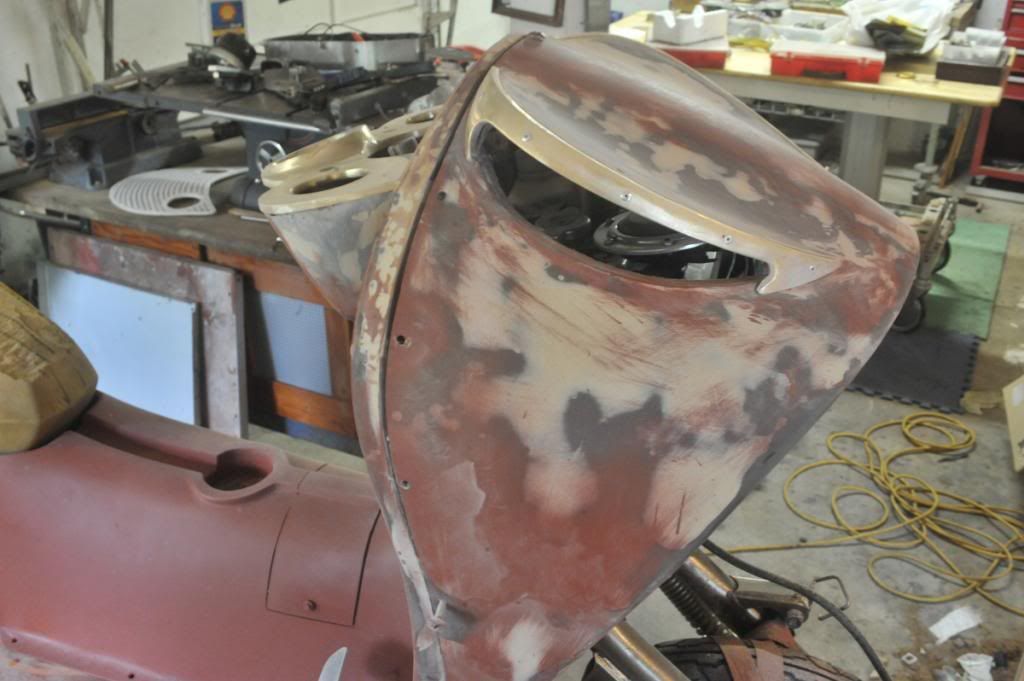 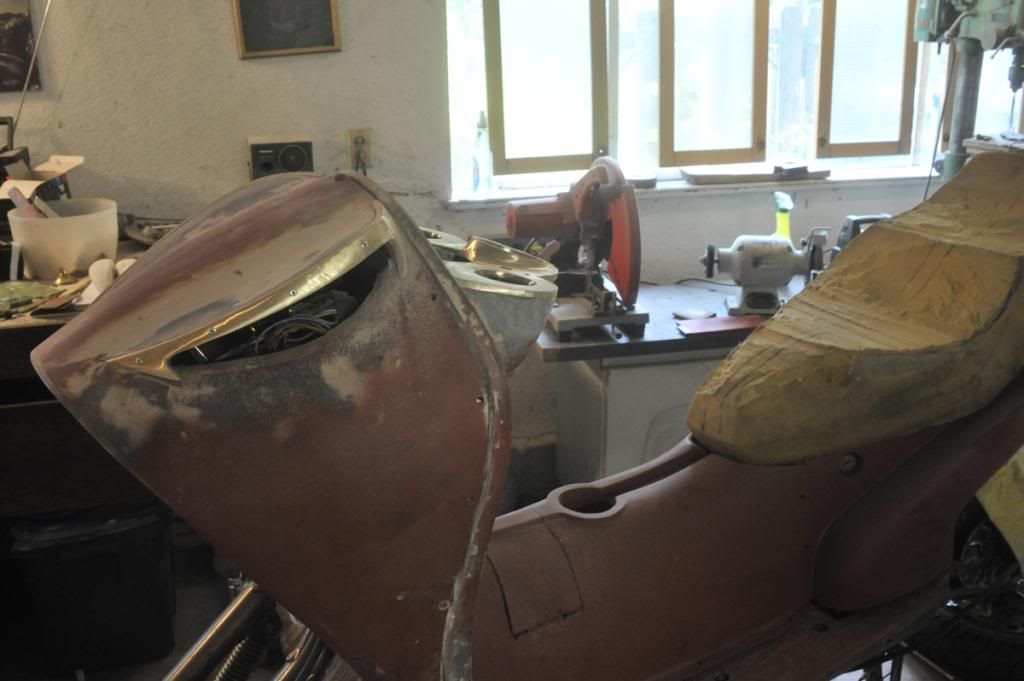 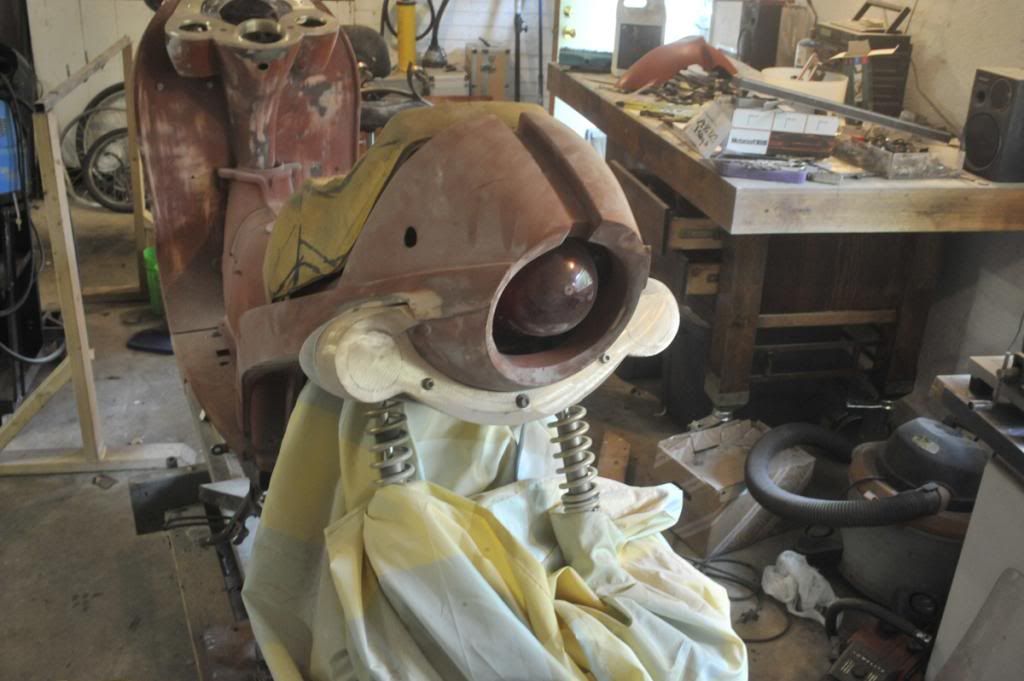 |
|
Junior
  
Currently Offline
Posts: 117
A+'s: 1
Joined: Jan 9, 2012 18:18:11 GMT -6
|
Post by dryshave on Apr 25, 2013 18:31:23 GMT -6
the brass work was dropped off about four weeks ago and supposed to be about five working days.
But, I'd rather have it done right at the quoted price, even if it takes a bit longer. Gives me time to do the final wet sand on the body parts. Set to order a bunch of parts this weekend, we'll see which arrive first.
|
|
Junior
  
Currently Offline
Posts: 117
A+'s: 1
Joined: Jan 9, 2012 18:18:11 GMT -6
|
Post by dryshave on Apr 24, 2013 19:59:39 GMT -6
|
|
Junior
  
Currently Offline
Posts: 117
A+'s: 1
Joined: Jan 9, 2012 18:18:11 GMT -6
|
Post by dryshave on Apr 6, 2013 9:41:17 GMT -6
|
|
Junior
  
Currently Offline
Posts: 117
A+'s: 1
Joined: Jan 9, 2012 18:18:11 GMT -6
|
Post by dryshave on Apr 5, 2013 14:39:13 GMT -6
When I re did the wiring harness, I utilized a lot of the old wiring pieces from the original 250 harness and there are a lot of re-connected (and soldered) lines.
Somewhere in the harness... there's a short... I just happened to catch a quick tiny puff of smoke when I hit the ignition switch. I couldn't tell which wire it came from, nothing was hot or shorted out, so I decided to remove the harness (for what seems the bizzilionth time) and do a full teardown... drastic and not what I wanted to do at this stage, but I need to have absolute confidence in the harness and positive that the circuit is 100%. The biggest problem is the selection of striped colored wires that are in a harness (12 to be exact) plus the 9 standard colors. Will have to rewire with alternate colors, the connectors aren't a problem (I've learned how they come apart - and I've got lots of extras to play with. The good thing, is that I can take out all the split connections and fold backs and really have a solid harness in the end.
No word from the foundry yet.... wasn't wanting to bother them too much, but next week I'll give them a call.
Got the panels all on and ready to start the final bodywork, I can do a lot of the little touch ups, but I really need the bronze pieces for final fitting before I can do final adjustments.
The list of to do things isn't as long... just expensive at the final stages.
Not much for photos available, but will post more as I start the final bodywork.
"No, I will weep no more. In such a night
To shut me out? Pour on; I will endure."
|
|
Junior
  
Currently Offline
Posts: 117
A+'s: 1
Joined: Jan 9, 2012 18:18:11 GMT -6
|
Post by dryshave on Mar 31, 2013 8:36:18 GMT -6
continuity from the kill switch opens and closes as it should.
spark plug is brand new and gapped.
tried a timing light trick and there's no power to the coil....
have swapped out the CDI unit for another I have in stock (used)
(reminds me of the time that I pulled into a gas station with no headlights, after about an hour of farting around with the electronics, the mechanic replaced one light and that worked, replaced the other light and that worked.... I had two burnt out headllights - what were the odds).
Coil tests good, pulse generator tests good, exciter coil tests on the low side but is within numbers.
Fuses are all intact.
Will give the local shop a call and see if they've got a performance CDI unit on hand for this thing - my multimeter doesn't go down low enough to test the ones I've got.
|
|

