Junior
  
Currently Offline
Posts: 117
A+'s: 1
Joined: Jan 9, 2012 18:18:11 GMT -6
|
Post by dryshave on Apr 11, 2014 21:25:51 GMT -6
|
|
Junior
  
Currently Offline
Posts: 117
A+'s: 1
Joined: Jan 9, 2012 18:18:11 GMT -6
|
Post by dryshave on Mar 17, 2014 19:49:25 GMT -6
Just got the steampunk project all together and started it up, was difficult to start and when it did I noticed that fuel was coming out of the ACV assembly tube that should be hooked up to the vacuum line. In the photo attached it's the tube that isn't connected to anything. The fuel line is hooked up correctly (it starts fine and runs good when I disconnect the tube in question and plug it off. Where's the fuel coming from?  Will post final pics soon... just waiting for a sunny day to roll it out for it's profile. 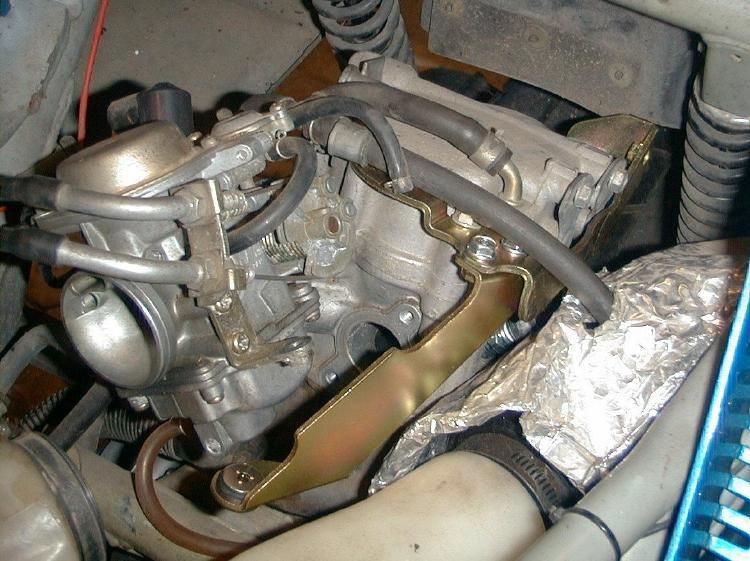 |
|
Junior
  
Currently Offline
Posts: 117
A+'s: 1
Joined: Jan 9, 2012 18:18:11 GMT -6
|
Post by dryshave on Feb 18, 2014 12:25:52 GMT -6
NO COMPLAINTS about the quality of the seat. Just not what we had discussed... the seat pad area wasn't supposed to be tuck and roll... just two "butt cheeks". The stripe down the back of the seat was to be only 1" wide. Currently the back of the seat sits up too high (was supposed to flow directly into the tailpiece), but not going to worry or stress about it. Maybe next winter after a year of driving the "HELYX" I'll change it up, but getting ready for next week, prepping the garage for next weeks painting session... soooo close! Thx for following along, been a long time in dog years  |
|
Junior
  
Currently Offline
Posts: 117
A+'s: 1
Joined: Jan 9, 2012 18:18:11 GMT -6
|
Post by dryshave on Feb 17, 2014 12:46:13 GMT -6
Thanks cyborg - though I'd have to say the the "roland sands tmax conversion" (check out the youtube video) is the sickest scooter in existence right now. so here's the update pics - lights are on, everything has been final test fit and the seat is back from the upholsterer.... not exactly what I had asked for and on a scale of 1-10 I have to give the final seat a 5. Quality is excellent, but it's not what I was looking for. It's going to have to do for now, though I am considering dying it a darker color (but that's something I can do later on). Hoping to see the extended throttle cables over the next couple of days, but now have to order a speedometer extension and a custom front brake cable, didn't think I would need them, but they're both 8" short  . Taking next week off to do final paint, should be complete (and rideable) by first week in March fingers crossed. You will notice the headlight bucket change in color as I'm finding the brass paint too much, so it's going to be painted the same color as the bike now. 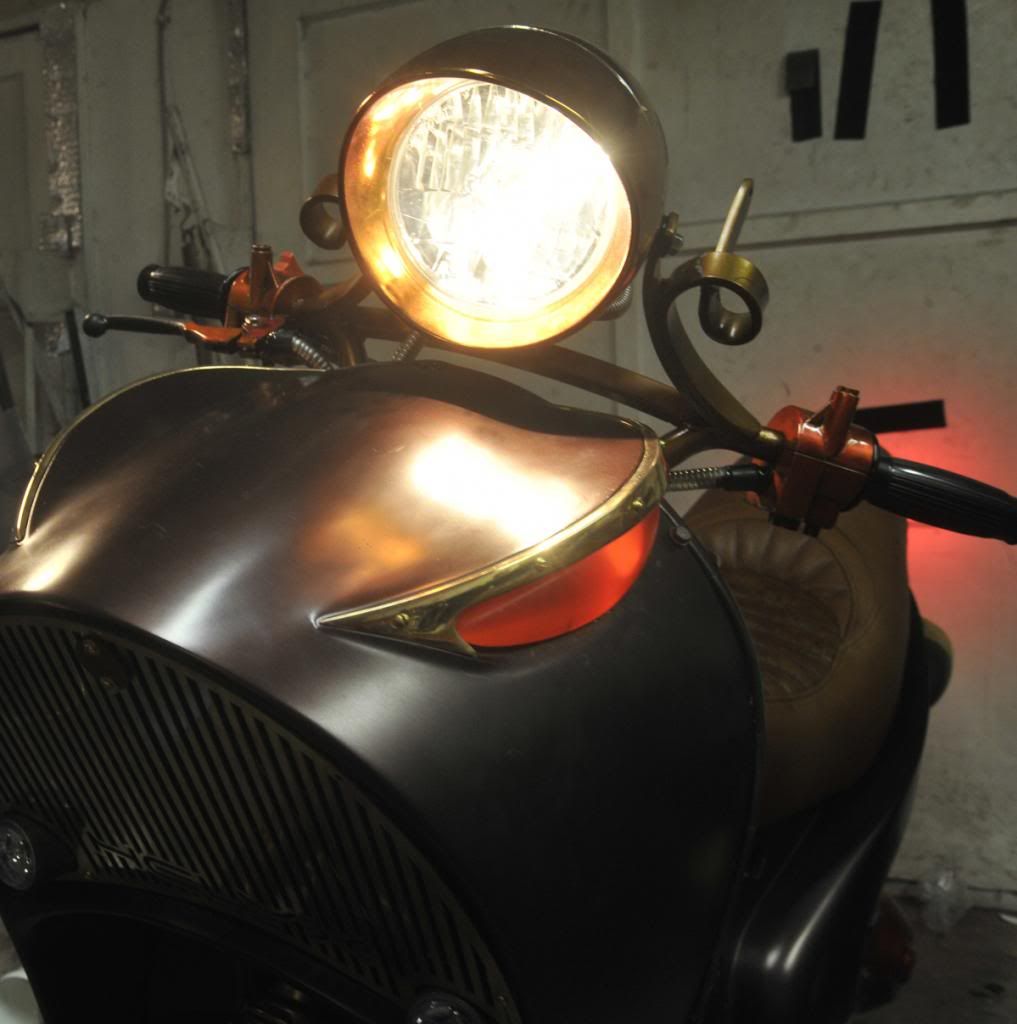 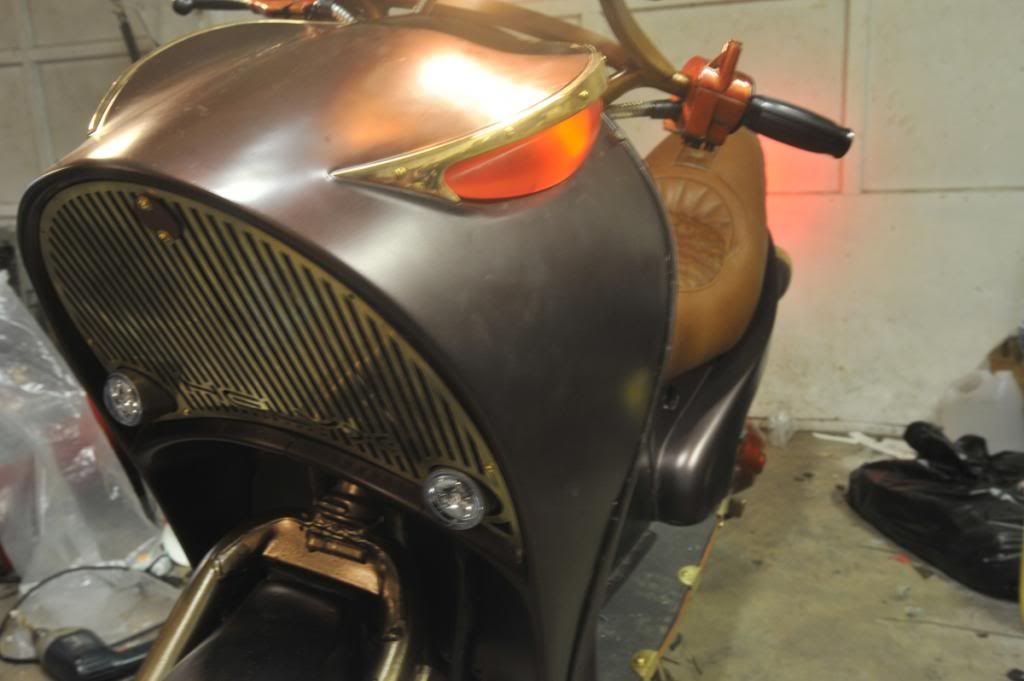 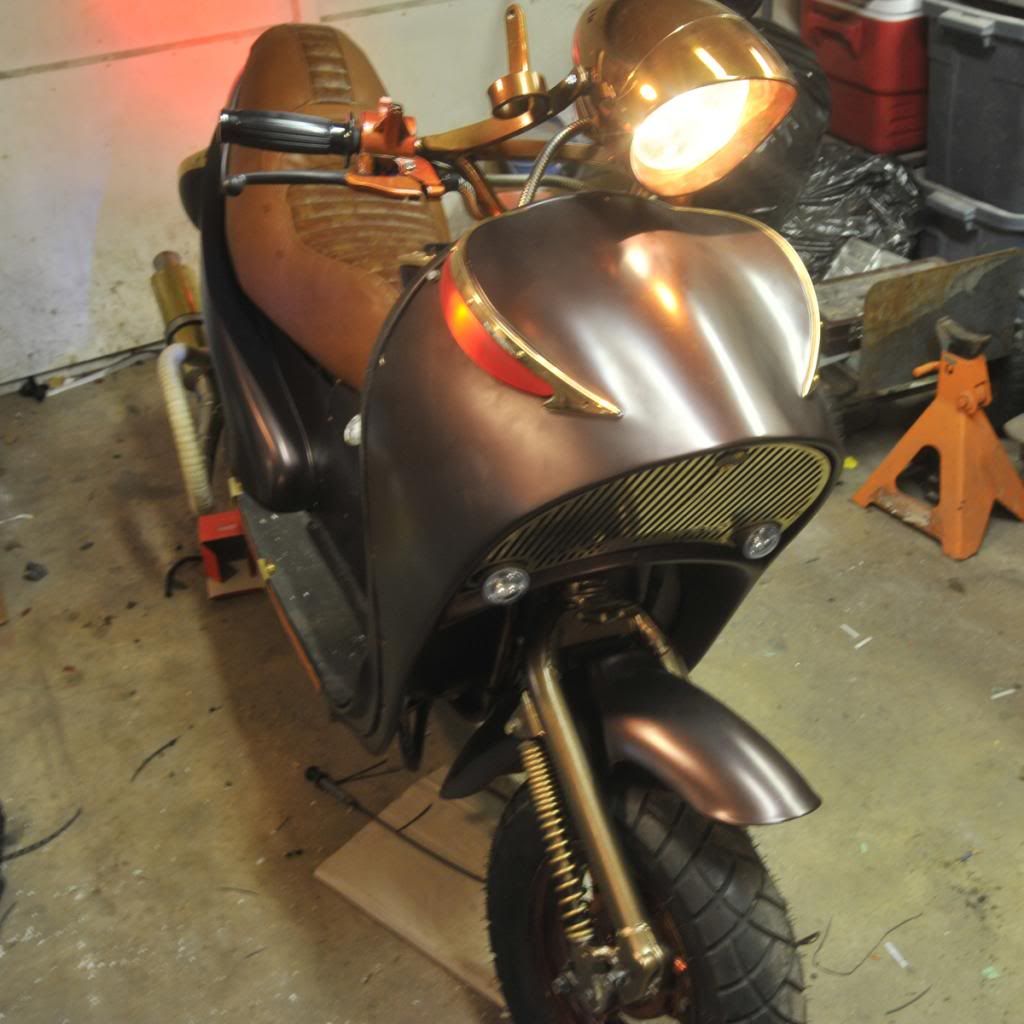 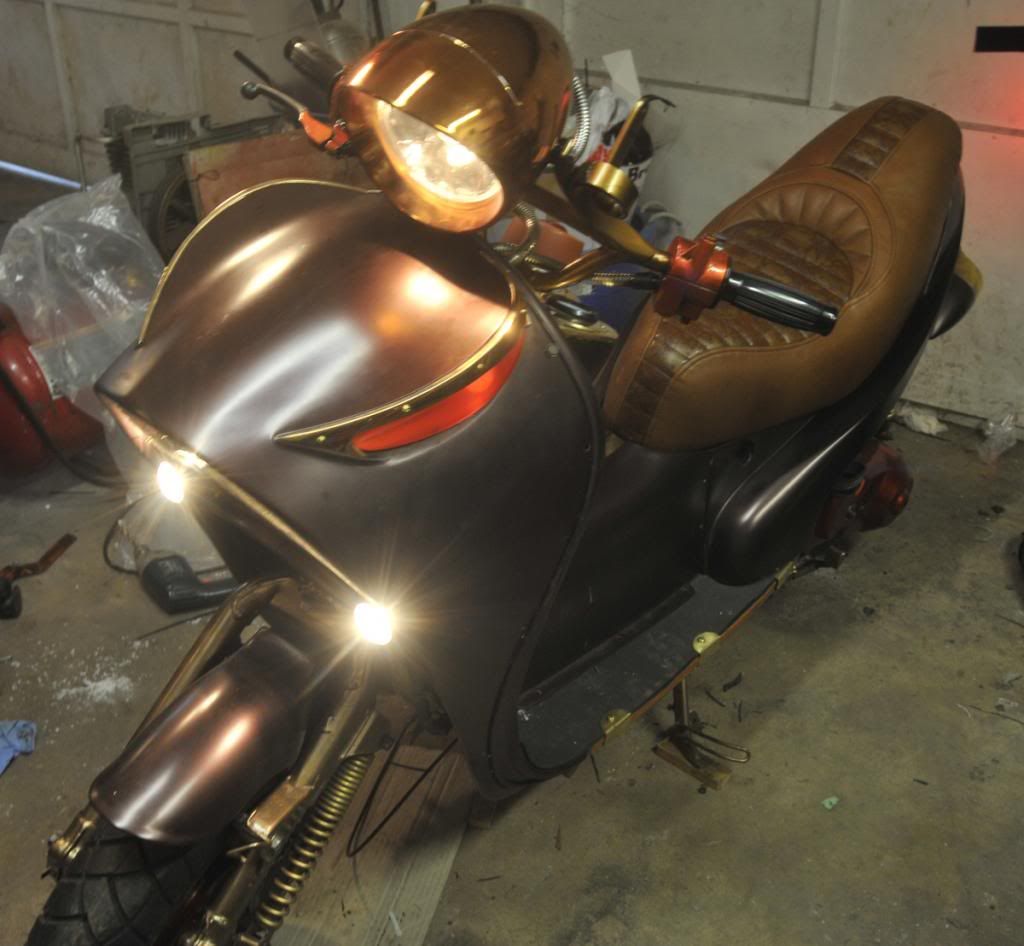 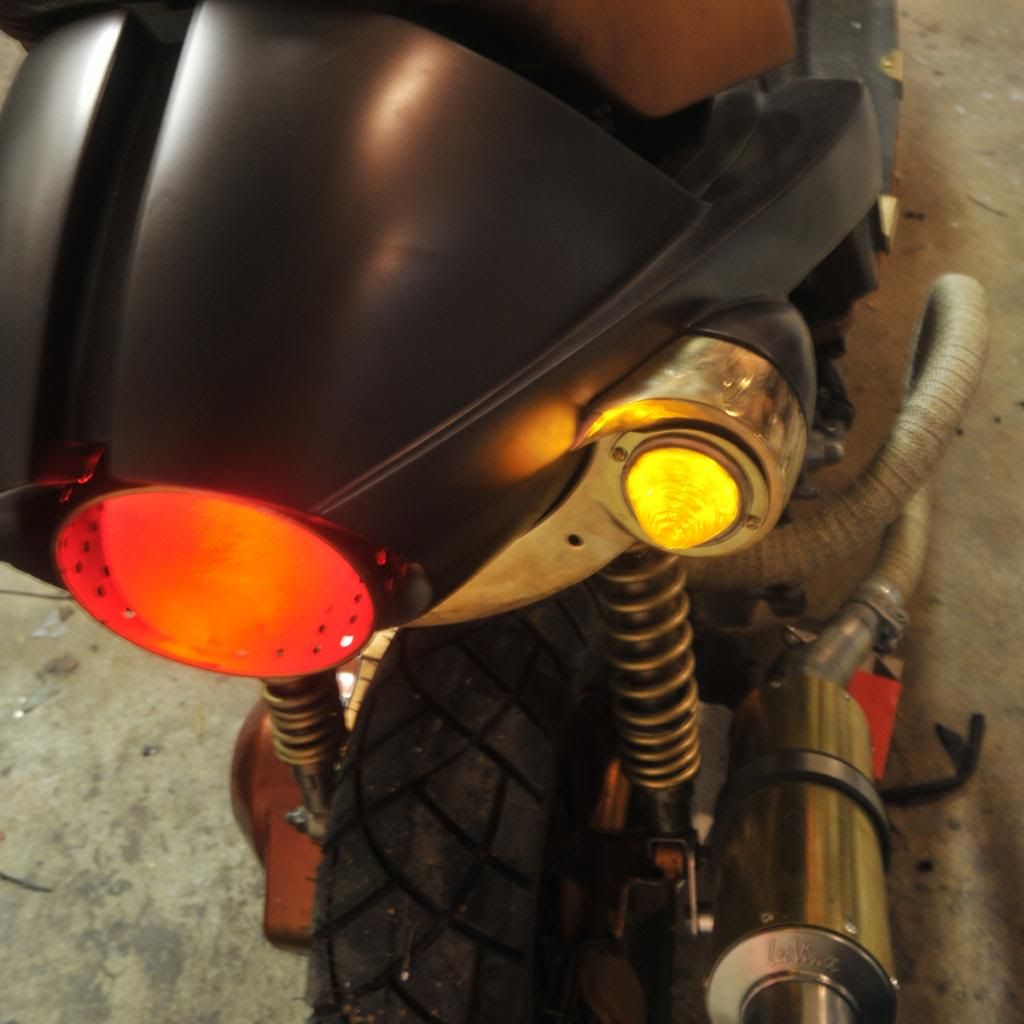 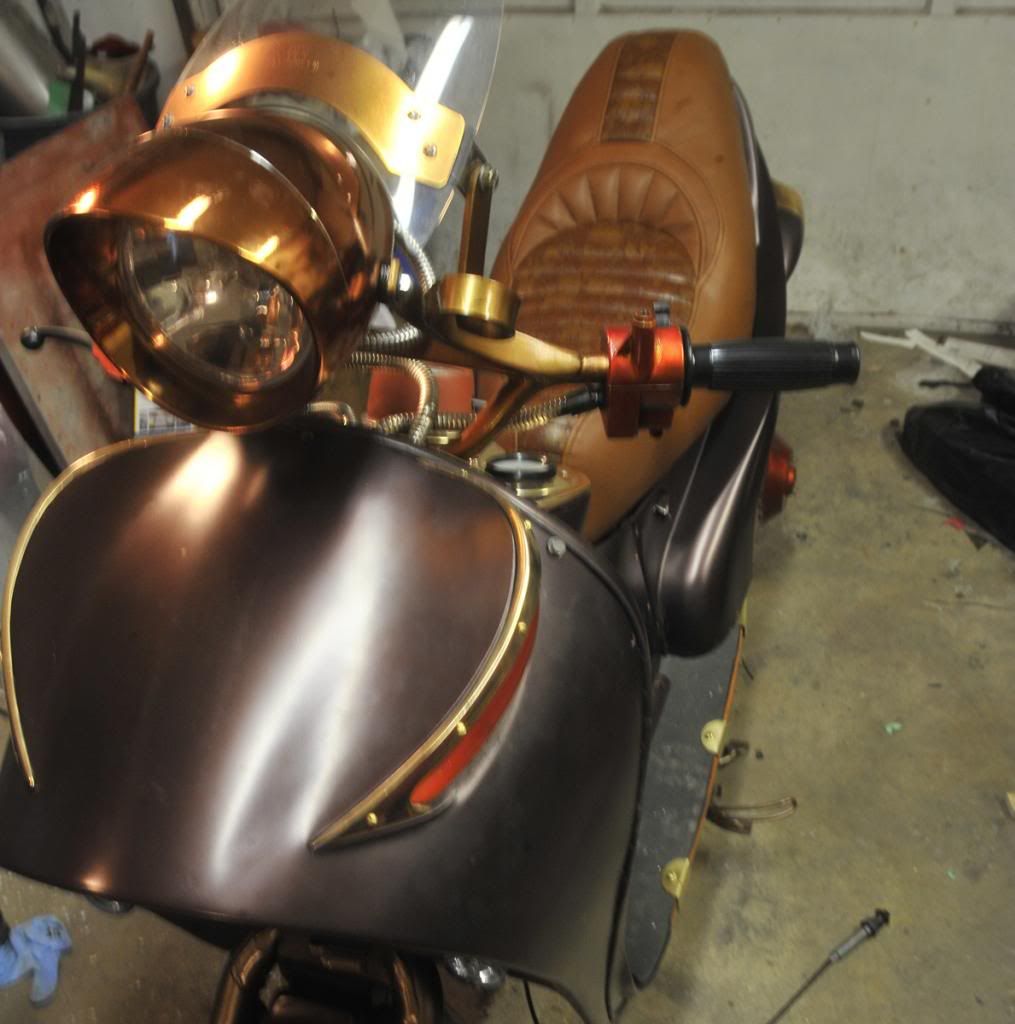 |
|
Junior
  
Currently Offline
Posts: 117
A+'s: 1
Joined: Jan 9, 2012 18:18:11 GMT -6
|
Post by dryshave on Feb 3, 2014 10:41:24 GMT -6
justbuggin2 - I'm trying a local guy in Mission BC that advertises a lot on CL locally. He's got a full shop setup in his basement and does a lot of work on boat upholstery and knocks off motorcycle seats over the winter, so he needs to get mine out before the spring rush hits. Very pleased with the water jet work on the grill, got two cut at the same time - design setup/cutting and material cost = $750 ($375 each) pricey but relative to the work. No complaints.
|
|
|
|
Junior
  
Currently Offline
Posts: 117
A+'s: 1
Joined: Jan 9, 2012 18:18:11 GMT -6
|
Post by dryshave on Jan 22, 2014 14:19:18 GMT -6
|
|
Junior
  
Currently Offline
Posts: 117
A+'s: 1
Joined: Jan 9, 2012 18:18:11 GMT -6
|
Post by dryshave on Jan 3, 2014 15:06:37 GMT -6
discovered that if you click on the first image you will go to the video located on my photobucket site - turn up the volume...hehe!
|
|
Junior
  
Currently Offline
Posts: 117
A+'s: 1
Joined: Jan 9, 2012 18:18:11 GMT -6
|
Post by dryshave on Jan 2, 2014 16:13:00 GMT -6
|
|
Junior
  
Currently Offline
Posts: 117
A+'s: 1
Joined: Jan 9, 2012 18:18:11 GMT -6
|
Post by dryshave on Nov 25, 2013 14:40:13 GMT -6
tried to read back to see if I said this yet .... IT'S ALIVE!!!!
Had it running a couple times over the weekend. Started from the ignition button and gas in the line (took coaxing the first time - with a shot of quikstart in the carb) but once the fuel started it flowing, it started again when switched off. Can't tell you how happy it made me to see the old girl finally running... Will post pics and video over the next week or so. Getting the other parts polished at the machinist... it'll be a christmas present...
|
|
Junior
  
Currently Offline
Posts: 117
A+'s: 1
Joined: Jan 9, 2012 18:18:11 GMT -6
|
Post by dryshave on Nov 25, 2013 14:22:57 GMT -6
that's what I thought... have blocked off the tube at the source.
Had the old girl running over the weekend... sounds pretty good just on the original muffler... waiting for the exhaust man to get back to me with the new tailpipe.
Have the tailpiece back from the machinist... WOOF! Taking the other pieces in to be polished... won't post new pics until they are all back... the tailpiece is PERFECT! Will update the post next week with new pics and end of year wrap up as I need to get on the christmas gift list... ALLEYOOP I have you down for a ride... thx.
|
|
Junior
  
Currently Offline
Posts: 117
A+'s: 1
Joined: Jan 9, 2012 18:18:11 GMT -6
|
Post by dryshave on Nov 22, 2013 9:13:51 GMT -6
There's only one port coming out of the thermostat cover and that is routed to one of the outlets on carb warmer. I could just use a t connection I suppose... very puzzling. I can rebuild a scooter from the ground up, but this has me stumped!
|
|
Junior
  
Currently Offline
Posts: 117
A+'s: 1
Joined: Jan 9, 2012 18:18:11 GMT -6
|
Post by dryshave on Nov 21, 2013 9:51:36 GMT -6
sorry CN250 Helix 1985 - the manual says it's for warming up the carb in cold weather. I don't really need it as this ride won't be seeing anything except sunny warm days.
It's the steampunk scooter engine - sorry haven't updated photos lately - but mostly waiting for parts to come back from the machinist.
Third time's the charm on the wiring harness - finally got spark to ignition - turned out to be a "cross design" problem (I made) with the Helix wiring diagram and the CH250 diagram), so I ended up redoing a new helix wiring harness.
Looking to do a full fire test today.... so I've just plugged off the coolant outflow for now.
Will shoot a quick video of this momentous event as it may prove handy in case something goes wrong... or just another entry to funniest videos. Thx
|
|
Junior
  
Currently Offline
Posts: 117
A+'s: 1
Joined: Jan 9, 2012 18:18:11 GMT -6
|
Post by dryshave on Nov 21, 2013 0:24:45 GMT -6
I'm having a brainfart and for the life of me can't remember where the outflow heater hose (routed from the thermostat - connected to the carb heater) routs to. The hose goes from the thermostat to the carb and the outflow goes to?  If I still had the 150 I'd just pop the cover. I've gone through the service manual over and over and still haven't found it... HELP! |
|
Junior
  
Currently Offline
Posts: 117
A+'s: 1
Joined: Jan 9, 2012 18:18:11 GMT -6
|
Post by dryshave on Oct 1, 2013 11:36:23 GMT -6
That's the plan!
I'm using an 1/8" amber acrylic plexi for the lenses and an opaque plexi for the lens backing. Leaving a tab/lip on each where they will be glued (fastened together). The airbox will be a softer white plastic material that is more flexible and plan to fasten the same way. I'll use the connecting sleeves off of the original box. The airbox is roughly 70% of the original size. I think that the increased airflow from the external filter will compensate for the smaller compartment.
Got word back from the upholstery guy - will have cord for front cowl by the weekend.
Got word back from the machinist - he's back - maybe have the piece back by friday or monday
Got word back from the exhaust guy- dropping off the muffler for copper sheathing on saturday
- things are starting to pick up.
|
|

