Junior
  
Currently Offline
Posts: 117
A+'s: 1
Joined: Jan 9, 2012 18:18:11 GMT -6
|
Post by dryshave on Apr 18, 2012 17:28:19 GMT -6
Pulled the casts today and very happy with the ease of release.... this time, minimal clean up required.
Will be ready to start the positive casts by the weekend.
It sure felt good to finally get that off the bench and the frame. I shot most of it on video, but have a few pics to upload tomorrow.
Now the real fun begins.....
|
|
Junior
  
Currently Offline
Posts: 117
A+'s: 1
Joined: Jan 9, 2012 18:18:11 GMT -6
|
Post by dryshave on Apr 19, 2012 19:25:09 GMT -6
SPLIT CASTS. Much easier to clean up thx to the prep work. Remember these are negative casts not the final casts !!!! You can see from the last pics... how much room I have to work around the radiator. I am adding "bolt on tabs" after the first coat of fiberglass on the positive mold. I've already got eight bolt on points identified. Will figure out the radiator access after the positive cast is complete, as I'll be able to see what I'm working with by then. The next steps are: Additional fiberglass changes to the front tire splash area on the cowl (will have more pics soon)     NOTE: I drilled holes through the two casts and am using zap straps to bind them together. Great for positioning as I will be glassing the bulk of each section apart. I will then zap the left and right panels together and glass the joints and 2nd coat the entire piece as one... sounds confusing, but hopefully the pics will illustrate.       Just itching to get into the mechanical layout of the bike, but that's something I can do when the weather gets better. (Picked up an 85 elite 150 with just 11,000 km on for $250 - seat is perfect, and the panels are mint! Pulled the carbs and tank. Soaked both in parts cleaner for 6 hours and re-assembled. Fresh gas and it started right up! I plan to ride this one until I get the project finished) |
|
Junior
  
Currently Offline
Posts: 117
A+'s: 1
Joined: Jan 9, 2012 18:18:11 GMT -6
|
Post by dryshave on Apr 25, 2012 17:41:21 GMT -6
ready to cast the dash piece and the tail pieces... pics up soon.
Taking my time to position the inside tabs etc..
|
|
Junior
  
Currently Offline
Posts: 117
A+'s: 1
Joined: Jan 9, 2012 18:18:11 GMT -6
|
Post by dryshave on May 8, 2012 16:35:18 GMT -6
|
|
Junior
  
Currently Offline
Posts: 117
A+'s: 1
Joined: Jan 9, 2012 18:18:11 GMT -6
|
Post by dryshave on May 9, 2012 16:43:57 GMT -6
re-do
|
|
Junior
  
Currently Offline
Posts: 117
A+'s: 1
Joined: Jan 9, 2012 18:18:11 GMT -6
|
Post by dryshave on May 9, 2012 16:48:53 GMT -6
|
|
Junior
  
Currently Offline
Posts: 117
A+'s: 1
Joined: Jan 9, 2012 18:18:11 GMT -6
|
Post by dryshave on May 15, 2012 19:38:25 GMT -6
POSITIVE CASTS ARE DONE!! THE REAR SECTION WAS SUCCESSFULLY CAST IN A SINGLE PIECE. I give myself a 9 out of 10 for that one!
The tail section was - as expected - the most complicated and difficult to do. Had to wear long sleeves again, as I kept getting my arms covered with resin. But they are all out of the molds and I've fiberglassed the tabs (seen above). Now it's a lot of fine tuning and many many more fittings so that the match is seamless. It took me five months to get to this stage... I will post more pictures tomorrow showing how they "rough" fit to the extended frame.
Looking for a new or gently used main crank for a CH250 and a really good mechanic to re and re "the crank" into my motor.
I will finish the fittings this week and start the bodywork by the weekend.
Time to get onto the frame and laying out the frame mounting tabs and jobbing out the customized fabrication of the gas tank ( I'm not set up to weld aluminum).
|
|
Junior
  
Currently Offline
Posts: 117
A+'s: 1
Joined: Jan 9, 2012 18:18:11 GMT -6
|
Post by dryshave on May 16, 2012 17:09:23 GMT -6
sorry for such dark photos, but I shot these early in the morning, before the sun got over to the garage side of the house. You will notice that the panels look pretty rough, that's bits of plasticine and vinyl release - that didn't - still clinging to the fiberglass. It washes off easy enough, but I'm not fooling myself, there's a lot of bodywork yet to be done. I've mounted the engine to give me an idea of clearance and I can finally see what I've read on the boards about having to remove the centre mount brackets. They clearly interfere with the engine covers. I'll remount the centre stand further up anyhow. I've removed the floorboard support arms so it looks kinda skinny through the stretched portion. You can also see the pop rivets I used to hold the mounting tab in place (while I fiberlassed it in position) I am planning to cut those off and seal up the holes once I get the two pieces sitting properly. That's the next task... getting the front two pieces to match perfectly. I will be cutting out the rear lens holes and finishing off the tailpiece roughup this week. More pics sometime next week   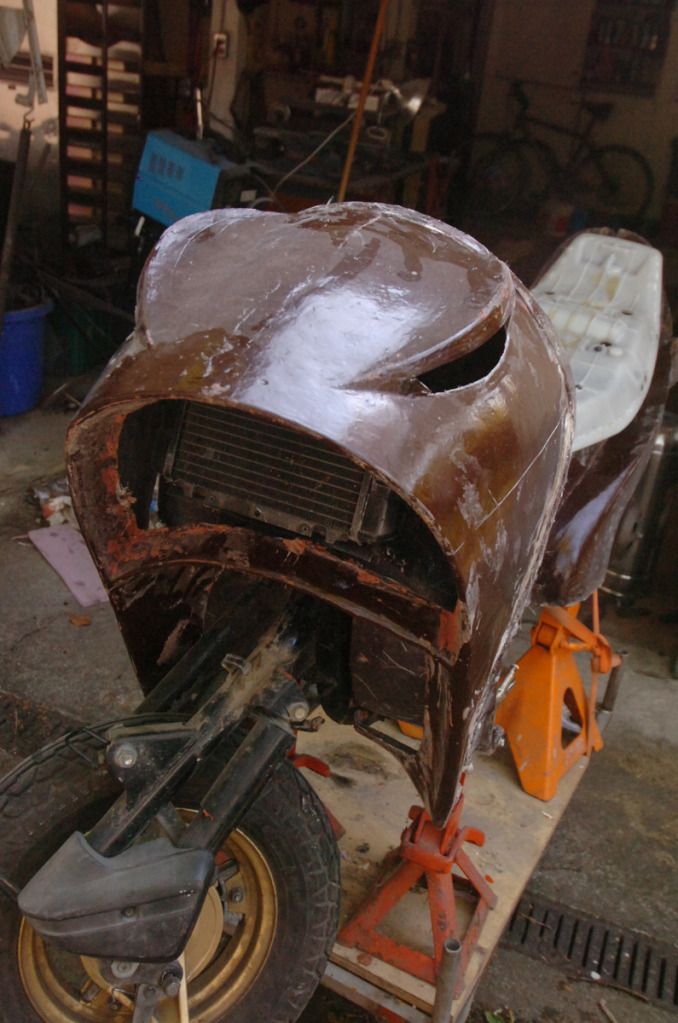 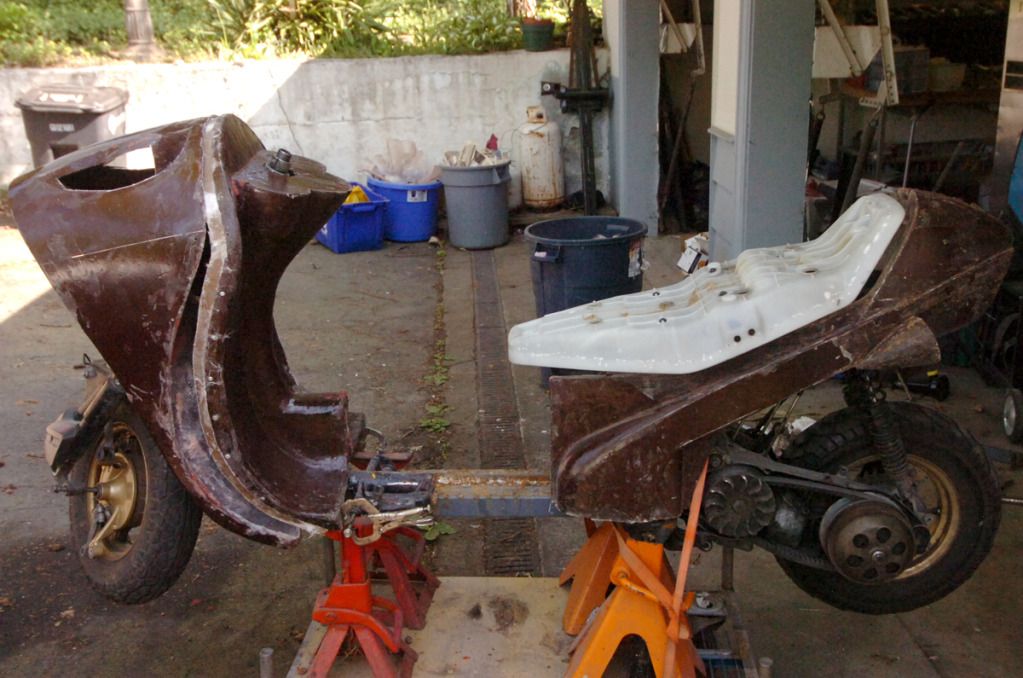 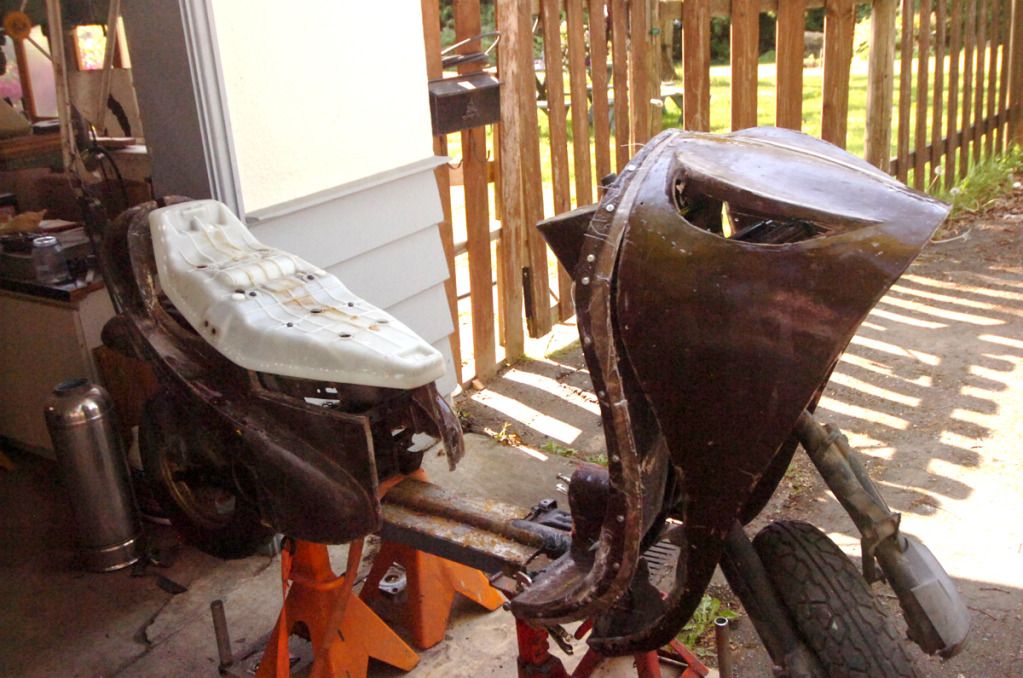 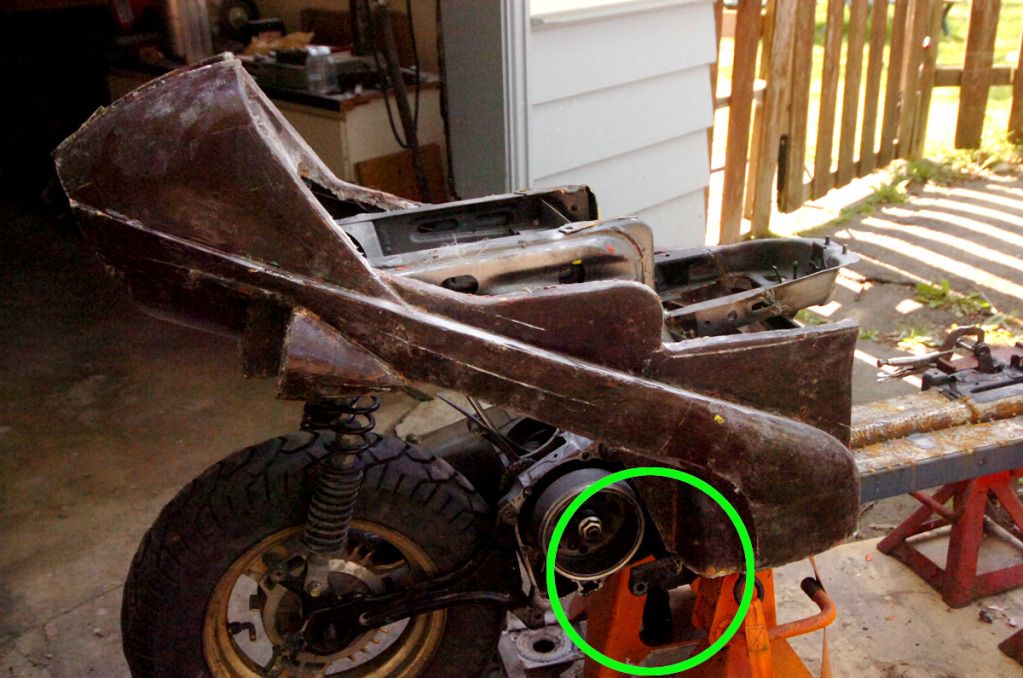 |
|
Junior
  
Currently Offline
Posts: 117
A+'s: 1
Joined: Jan 9, 2012 18:18:11 GMT -6
|
Post by dryshave on May 23, 2012 16:04:08 GMT -6
Came up with a crafty way of replacing the radiator overflow bottle. The original was never designed in, and I had a couple of bottles used in a hydraulic lift bed that I salvaged. I wonder if the missus will miss her stainless steel hood vent.... (kidding - it was from scrap as well). I've added (at the last minute) a small shroud at the top of the radiator - extending to the overflow bottle. This is where I plan to terminate the wiring harness for the front. Planning out the gas tank, radiator tubes and the dash mods this week. The pieces are going on and off regularly as I modify the frame and add mounting points. The rear section fits perfectly and I'm mocking up the brass section to go around the signal lights (pics to come). Lots of room for toolbag/papers/ goggles and gloves under the seat with the new tray. I plan to mount the coil close to where it would have been placed originally. Old center stand mounts have been cut off and the stand mounted 8" forward (frame was stretched 18") I've cut off the kickstand as well and will weld in place this week. Please excuse my sloppy welds (no gas). I've been tacking everything for now and will clean up and finish the welds after I mount the kick stand. I've used a stock CH150 seat tray and added 6 contact points to align to the new frame. I plan to cushion them with pieces cut from old mouse pads. A locking mechanism will need to be added once I get the glass settled in. 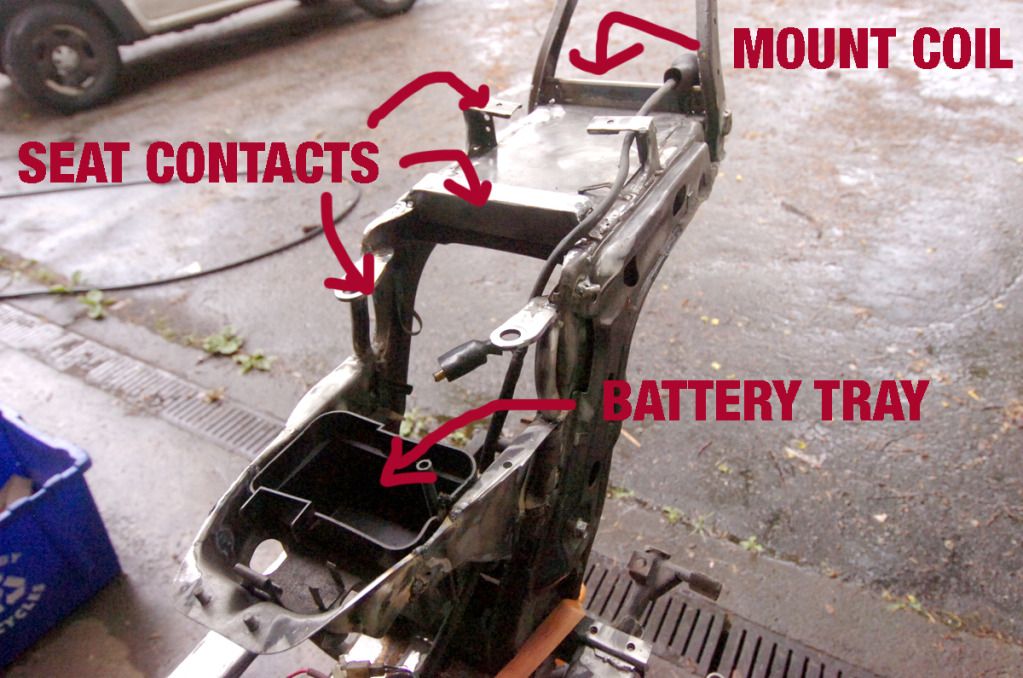 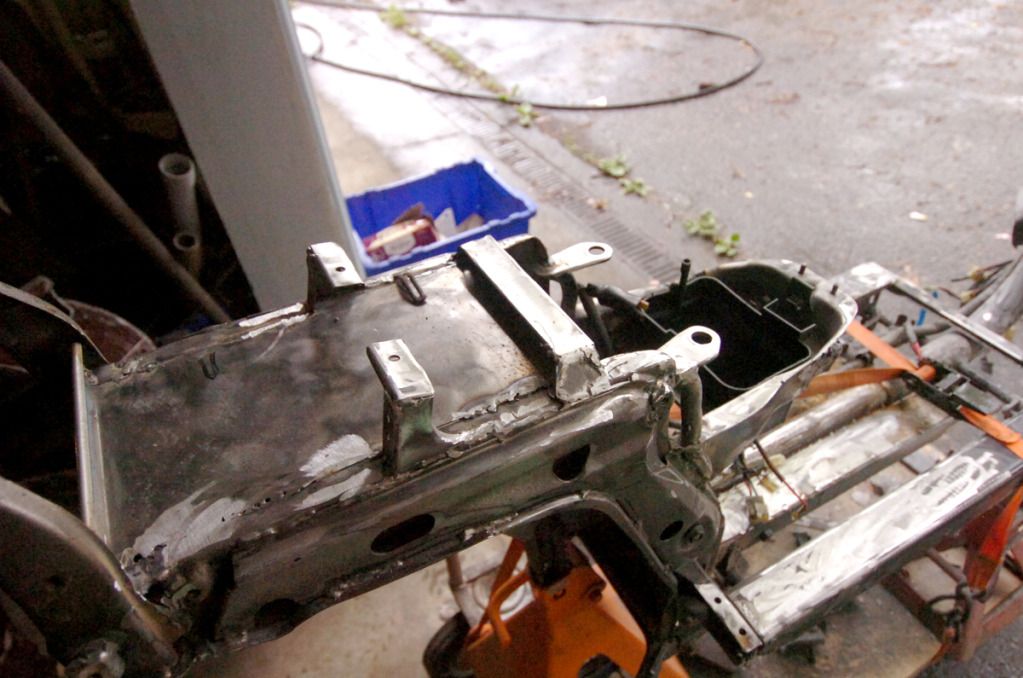 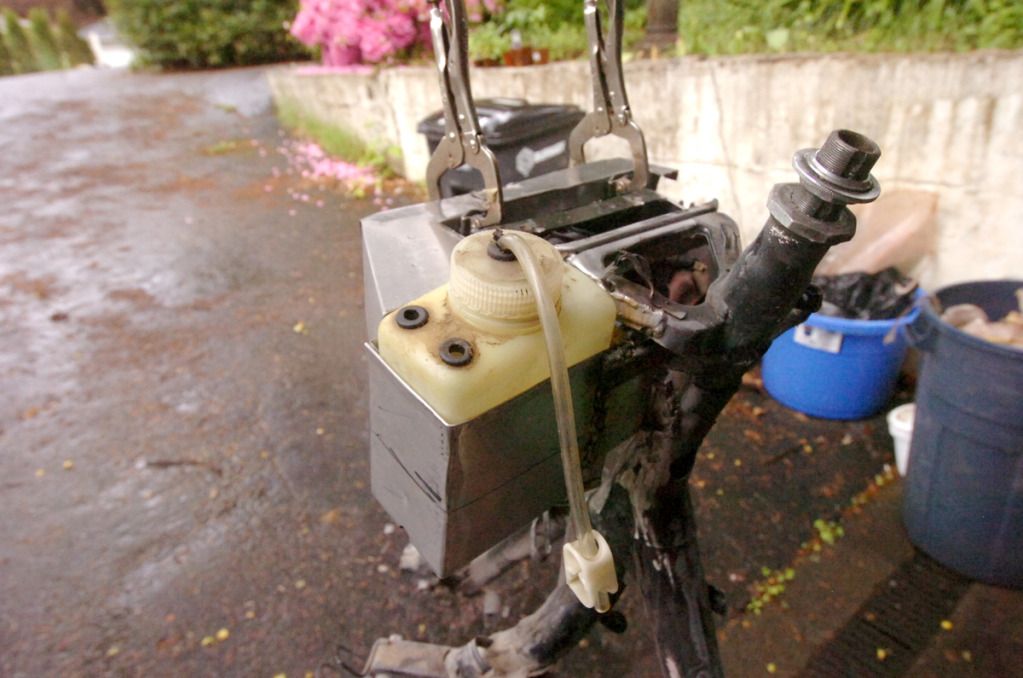 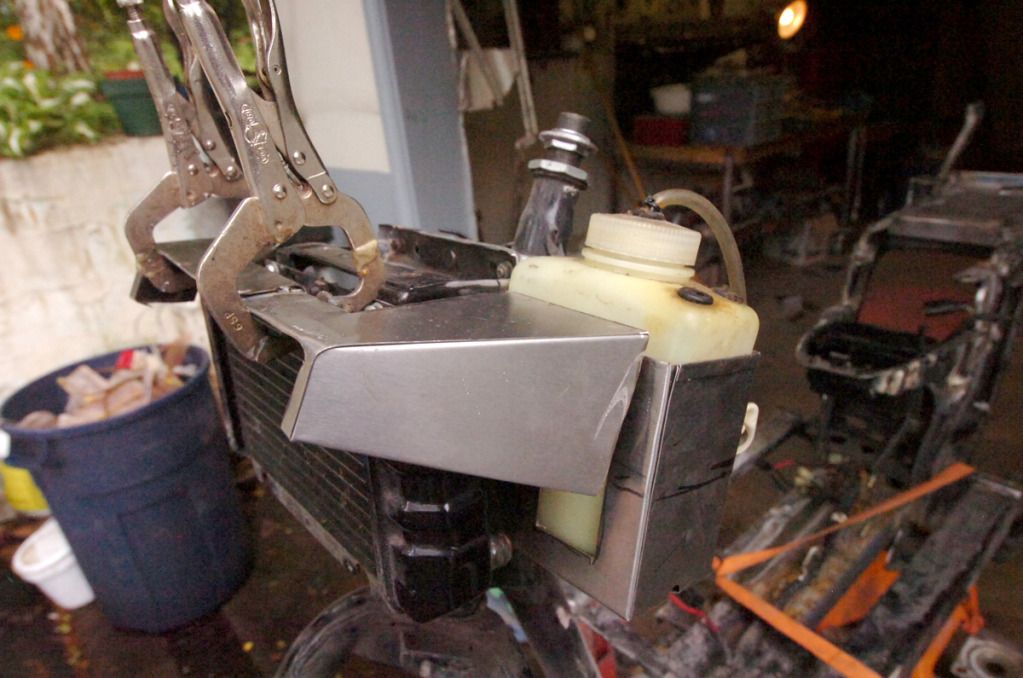 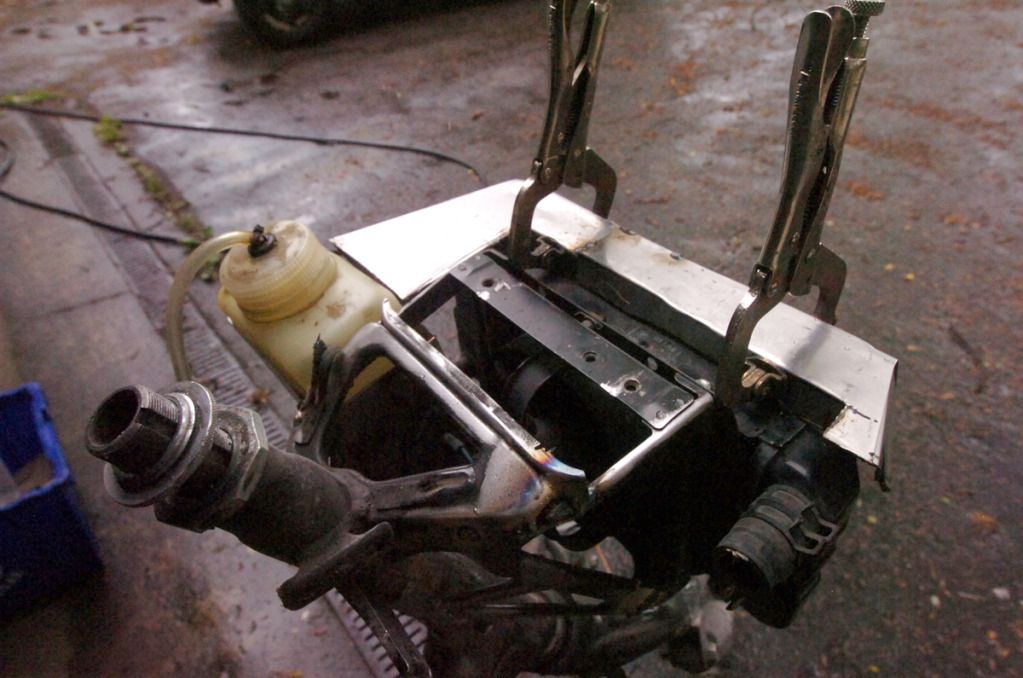  Focus right now is getting the frame to fit properly and how everything fits (changes) the panels So there won't be much clean up visible on the body panels for a while, but there will be visible progress. How do you eat an elephant? One chunk at a time  |
|
|
|
Post by justbuggin2 on May 24, 2012 21:32:20 GMT -6
looks like you are getting there just gonna take some time
|
|
Junior
  
Currently Offline
Posts: 117
A+'s: 1
Joined: Jan 9, 2012 18:18:11 GMT -6
|
Post by dryshave on Jun 1, 2012 18:05:07 GMT -6
Finished the wiring harness tabs, figured out the mounting position for all the electronics and am working on re-jigging the wiring harness. I'm mounting the ignition off to the right side of the seat and moving the fusebox under the seat.
I've cleaned up most of the welds and started fabricating the tank mounts.
Once I've got all the wiring locations completed, it'll be time to get back onto the bodywork.
... still have to locate a new(used) crank as I suspect the one I've got is a little sloppy.
It looks like nice weather for the weekend so I will drag it out of the garage for new photos and have something new up on tuesday.
Life's a bitch.... but I'm gonna make it my bitch!
|
|
Junior
  
Currently Offline
Posts: 117
A+'s: 1
Joined: Jan 9, 2012 18:18:11 GMT -6
|
Post by dryshave on Jun 5, 2012 16:33:24 GMT -6
Finished (and tested) the updated wiring harness and test mounted all the devices. I thought that I had taken enough off for the stator housing to clear the frame - thought wrong! I had to take another slice off and re-weld the cut area. Doesn't affect the structure and there is "just enough" clearance. I've also noticed that the starter stud will have to be rotated a few degrees to clear the motor mount support. Have cut the old airbox from the 150 and will use that u joint as the 250 airbox is too big. Looking for another spot for the ignition switch as there is less room behind the battery than I thought. Did a quick assemble to make sure everything has good clearance. The front cowl will have to be cut to accommodate the wiring harness and radiator lines. cleaned up most of the welds, tested the centre and sides stands (sweet) Working on engine clearances for the 250 motor (remember this is a 150 frame) and looking for a new route for the radiator lines. Looking to have the frame off for powder coating by the end of june. I'm taking a week off at the end of June and hoping for better weather so I can move the body panels outside for some serious prep work. 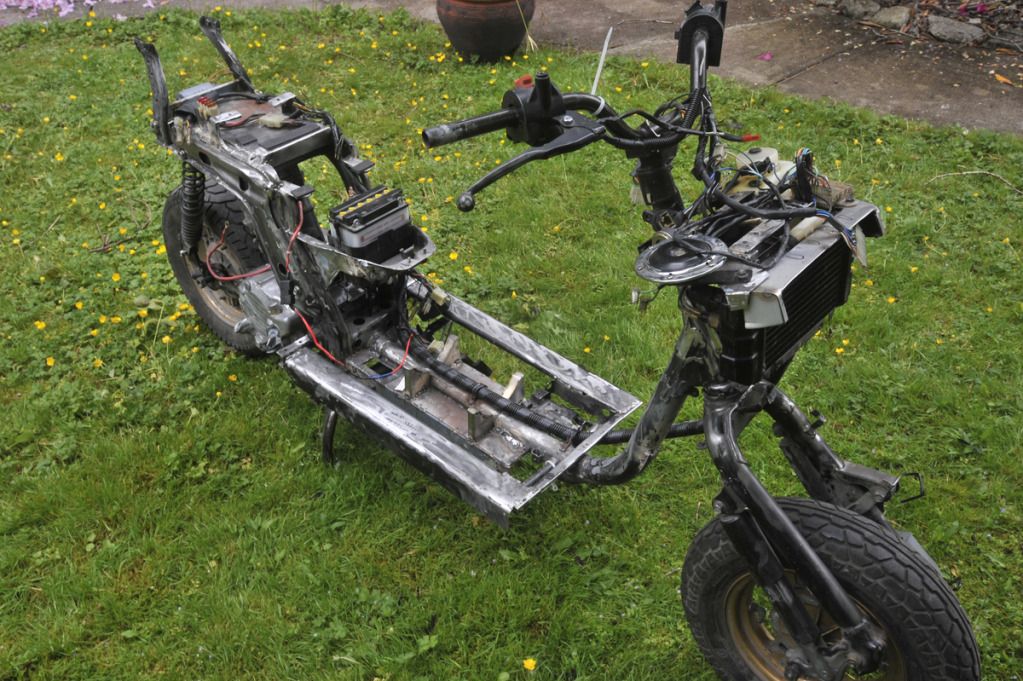 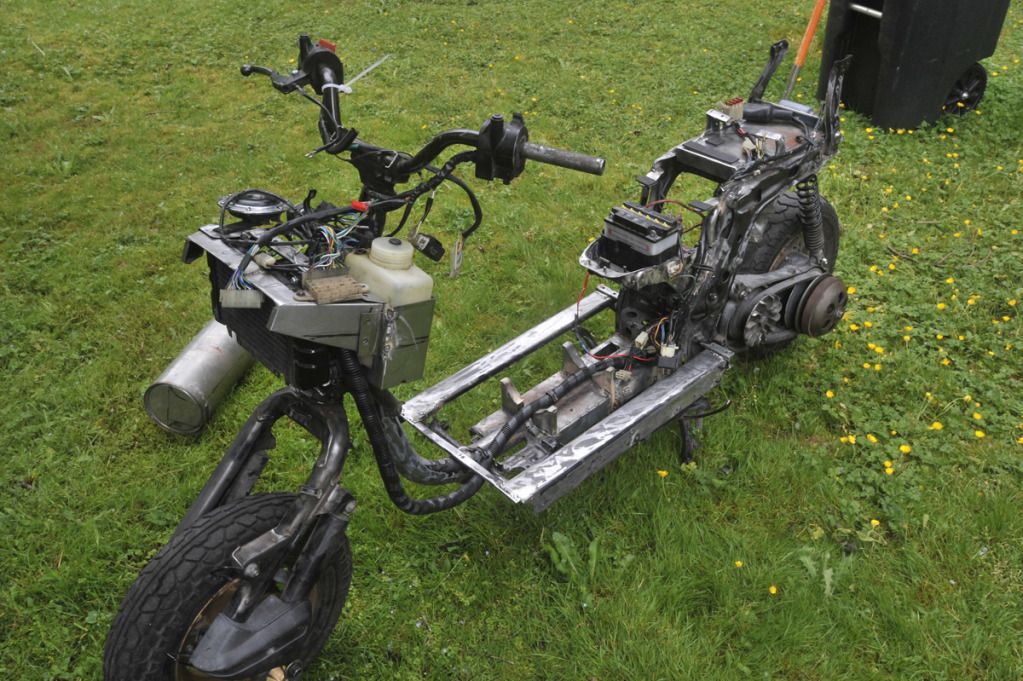 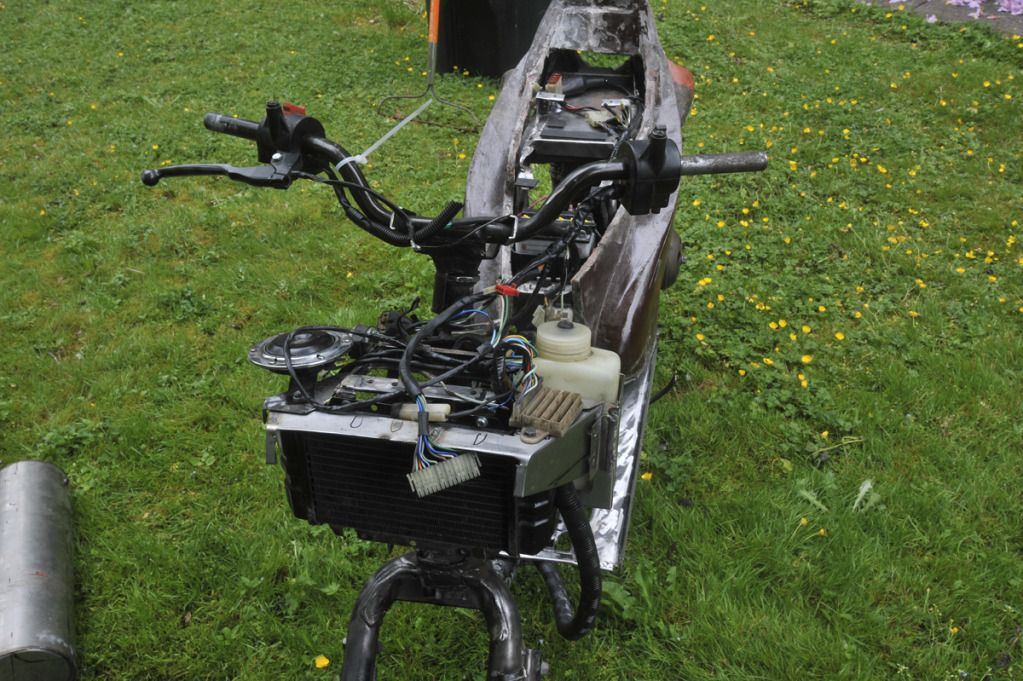 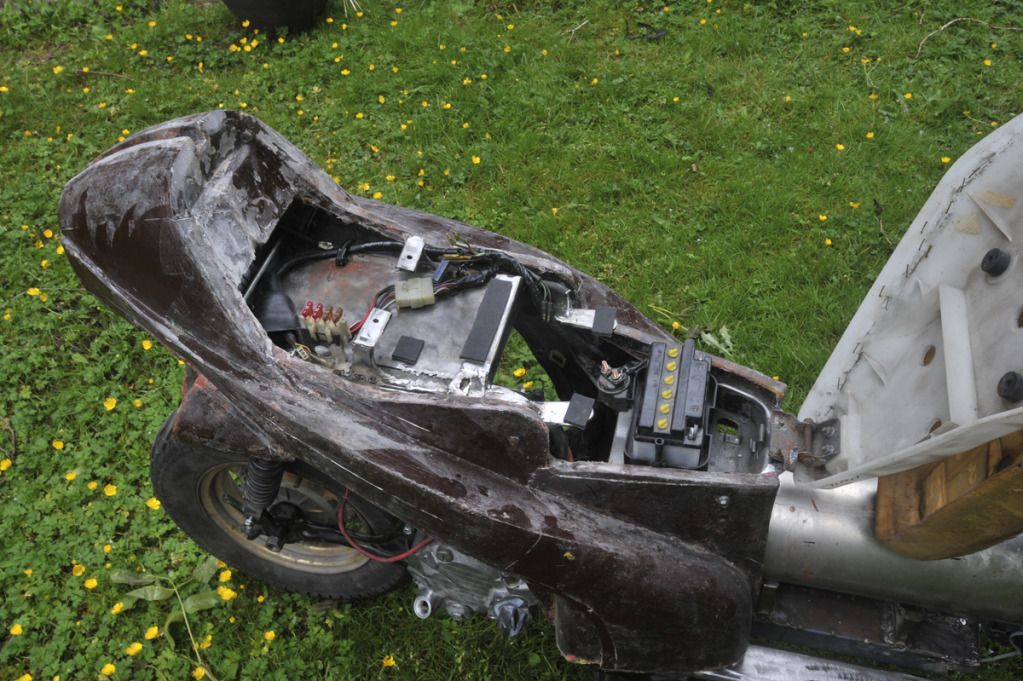 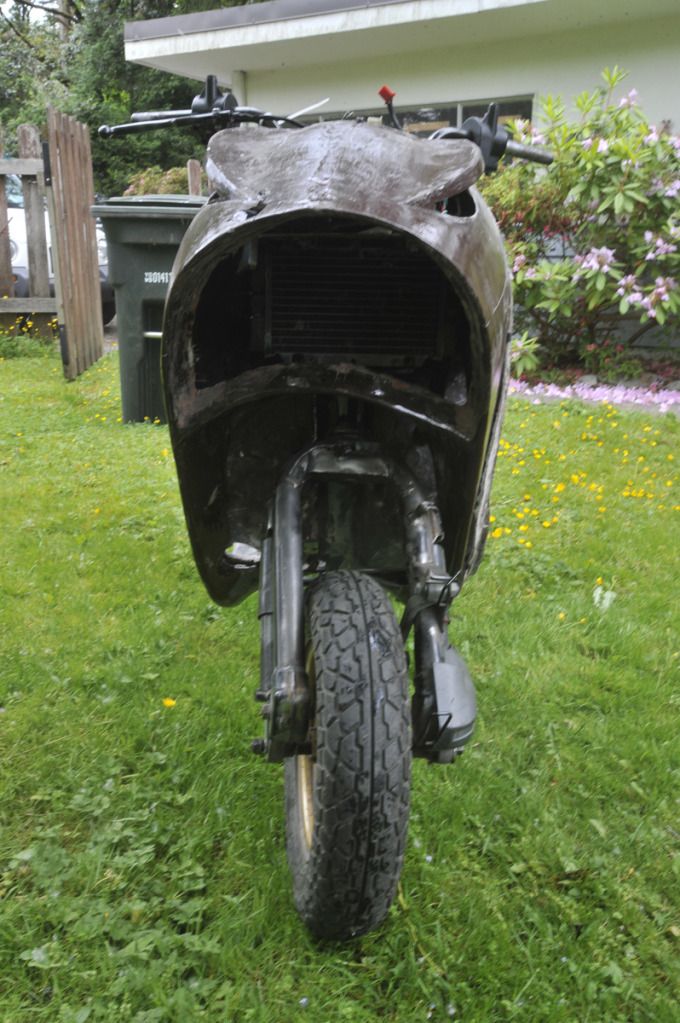 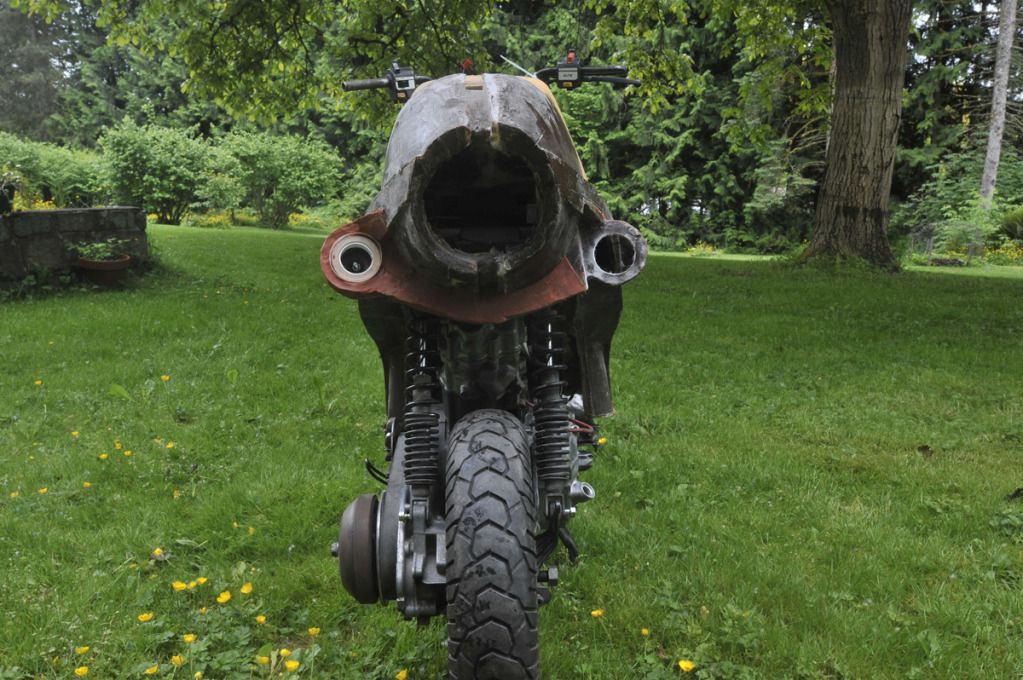 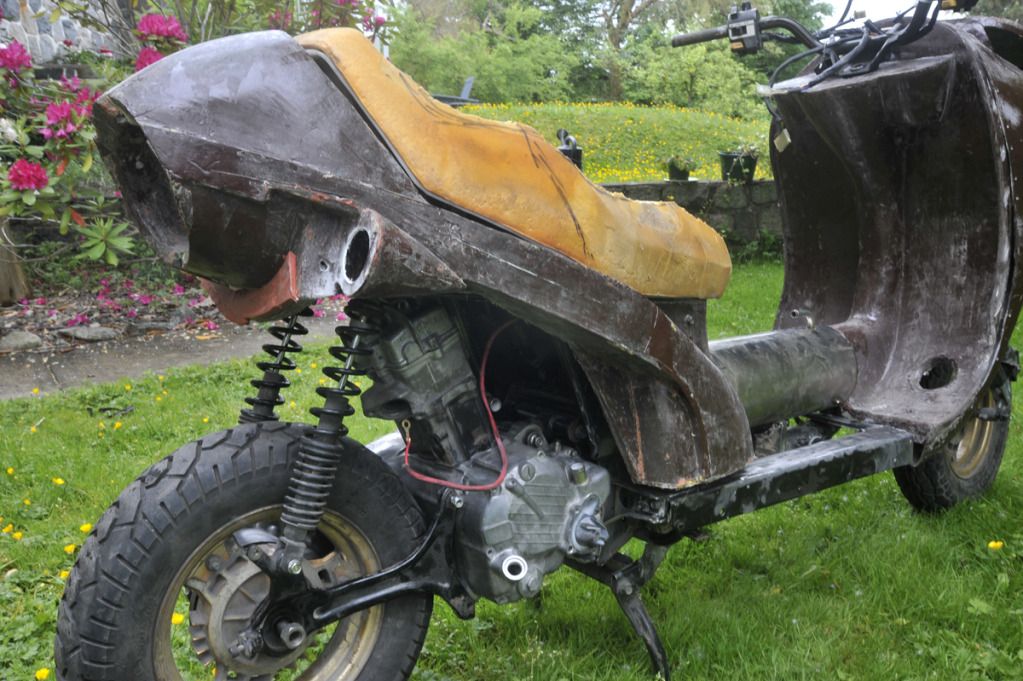 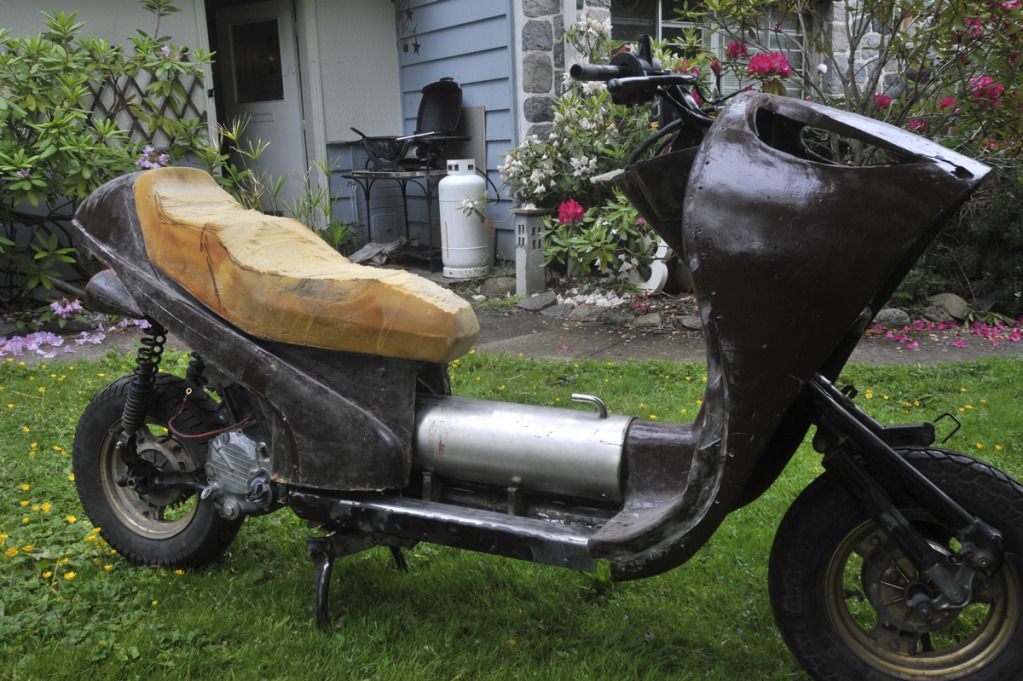 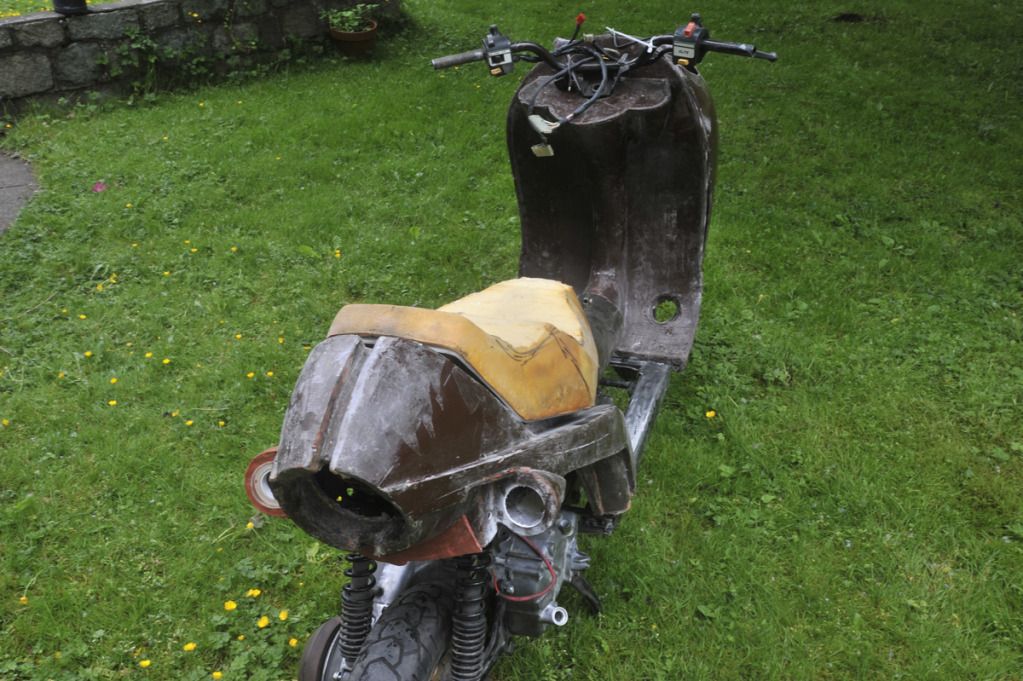 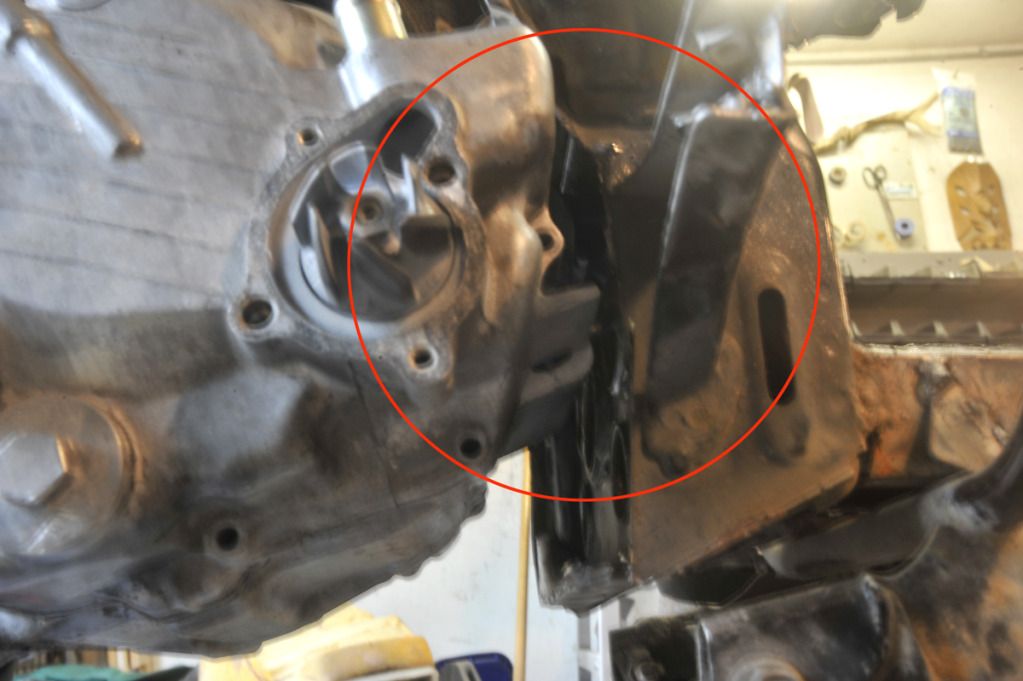 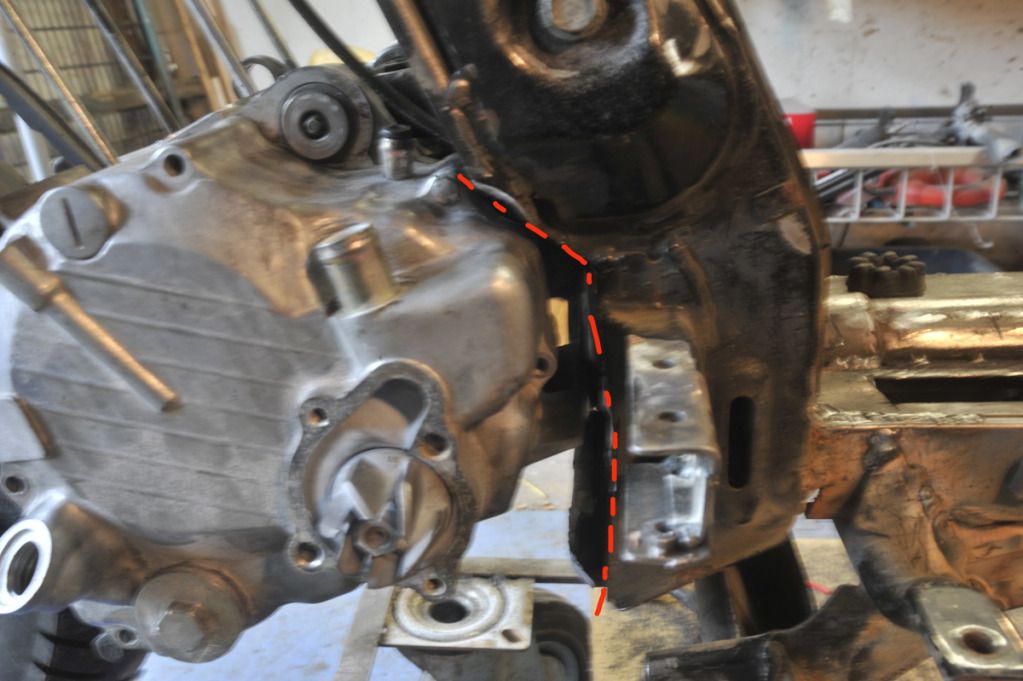 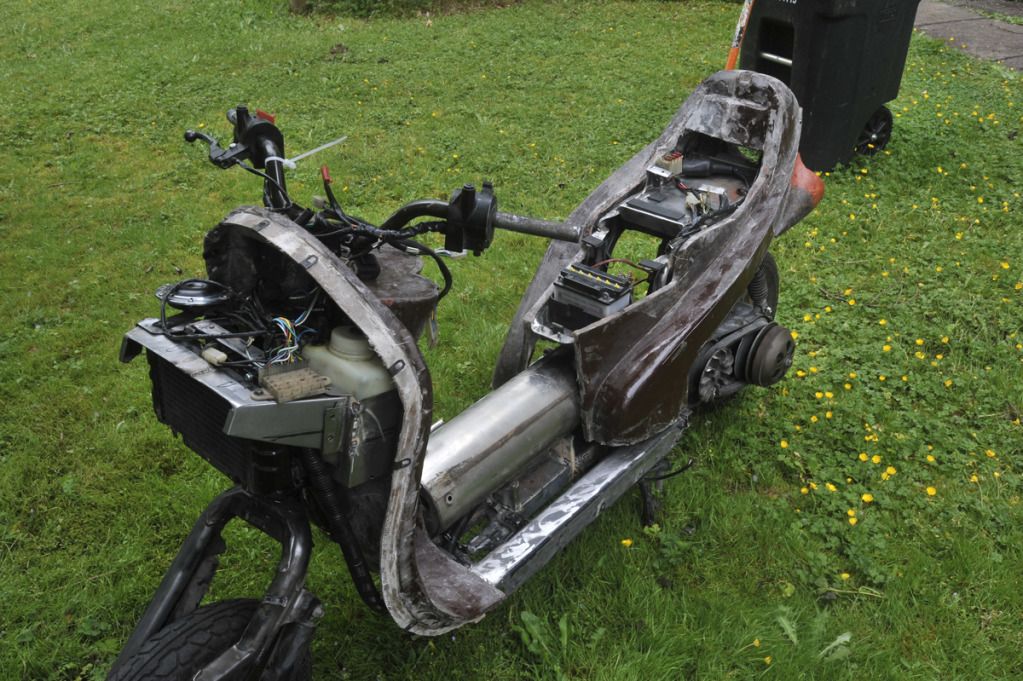 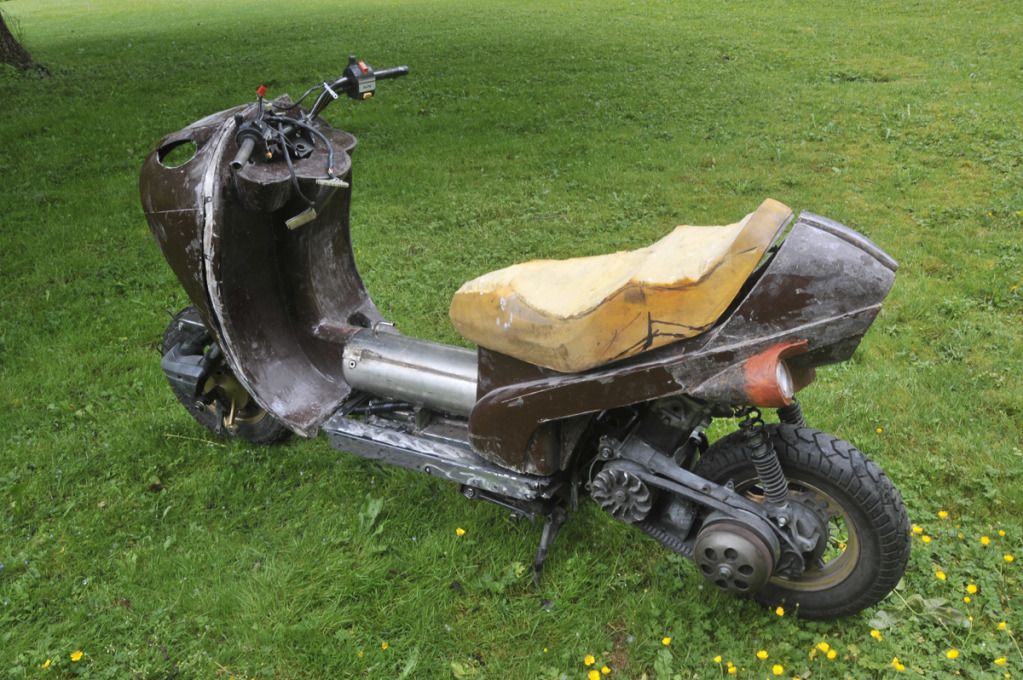 |
|
Junior
  
Currently Offline
Posts: 117
A+'s: 1
Joined: Jan 9, 2012 18:18:11 GMT -6
|
Post by dryshave on Jun 19, 2012 16:48:37 GMT -6
|
|
Junior
  
Currently Offline
Posts: 117
A+'s: 1
Joined: Jan 9, 2012 18:18:11 GMT -6
|
Post by dryshave on Jun 19, 2012 16:54:47 GMT -6
You can also see where I've changed the location of the battery and CDI to the back of the foot tray.
I've also moved the ignition switch to just under the seat on the left and spent a lot of time rejigging the seat lock mechanism to work properly (the bracket for the seat lock can be seen in the third new picture) and the last photo.
All this rearrangement was preplanned before I did the wiring harness (thank god!). It gives me a lot of open space where the carb is and easy access to the engine adjustments.
|
|
|
|
Post by madcollie on Jun 19, 2012 18:30:04 GMT -6
Dry, in the 9th photo, is that your horn (large round object with dark center)? If it is (looks huge) then you are looking to not only look COOL going down the road but sound like a MAC truck when you hit it?  This is by far one of my favorite thread and don't worry that there aren't many replies, we're just stunned at the workmanship your showing us. Keep up the great work. I'm sure the end product will be STUNNING! ;D M/C |
|

